Monitoring a Firepower Upgrade with Tail

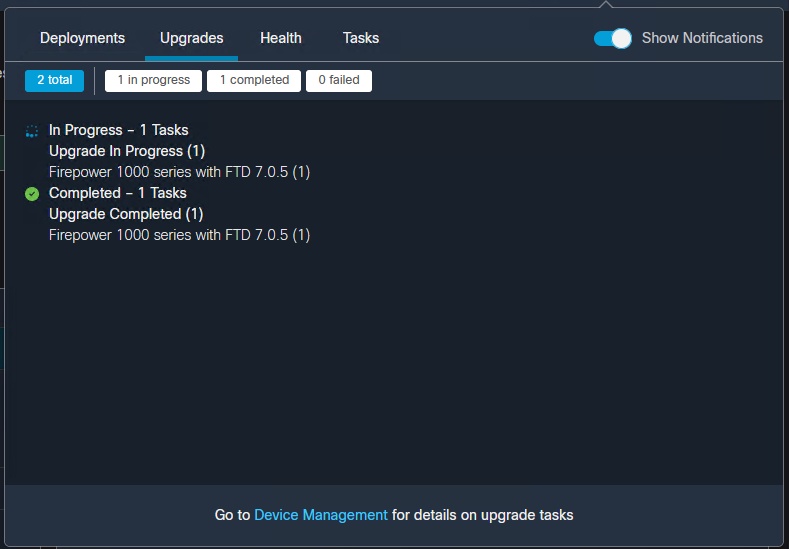
While Cisco’s Secure Firewall Management Center is a great tool there’s still some missing functionality here and there. Upgrades, for one, is a great example. How do you know when an upgrade has failed? Why did it fail? Where did it fail?

Sure the Task pane shows us the progress but truthfully that’s about it.

So for today, a quick update on how I monitor the progress of a Firepower Threat Defense upgrade through the command line.

  • First, SSH into the device.
  • Issue the “expert” command.
  • Enter into super user mode with “sudo su”
  • Change directory to “/ngfw/var/log/sf/<upgrade version number>”
  • Run “tail -f status.log”
  • Roll that beautiful bean footage.
Last login: Tue Jan 24 18:18:07 UTC 2023 from 192.168.100.30 on pts/0
Successful login attempts for user 'admin' : 1

Copyright 2004-2019, Cisco and/or its affiliates. All rights reserved.
Cisco is a registered trademark of Cisco Systems, Inc.
All other trademarks are property of their respective owners.

Cisco Fire Linux OS v6.4.0 (build 2)
Cisco Firepower 1120 Threat Defense v6.4.0.9 (build 62)

> expert
**************************************************************
NOTICE - Shell access will be deprecated in future releases
         and will be replaced with a separate expert mode CLI.
**************************************************************
admin@lab-ftd-01:~$ sudo su

We trust you have received the usual lecture from the local System
Administrator. It usually boils down to these three things:

    #1) Respect the privacy of others.
    #2) Think before you type.
    #3) With great power comes great responsibility.

Password:
root@lab-ftd-01:/# cd /ngfw/var/log/sf
root@lab-ftd-01:/ngfw/var/log/sf# ls

Cisco_FTD_SSP_FP1K_Upgrade-7.0.5 

root@lab-ftd-01:/ngfw/var/log/sf# cd Cisco_FTD_SSP_FP1K_Upgrade-7.0.5
root@lab-ftd-01:/ngfw/var/log/sf/Cisco_FTD_SSP_FP1K_Upgrade-7.0.5# tail -f status.log
ui: Upgrade in progress: ( 0% done.26 mins to reboot). Checking device readiness... (000_start/000_0_start_upgrade_status_api_stack.sh)
ui: Upgrade in progress: ( 0% done.26 mins to reboot). Checking device readiness... (000_start/000_check_platform_support.sh)
ui: Upgrade in progress: ( 0% done.26 mins to reboot). Checking device readiness... (000_start/000_check_update.sh)
ui: Upgrade in progress: ( 0% done.26 mins to reboot). Checking device readiness... (000_start/099_check_legacy_amp_port.pl)
ui: Upgrade in progress: ( 0% done.26 mins to reboot). Checking device readiness... (000_start/100_start_messages.sh)
ui: Upgrade in progress: ( 0% done.26 mins to reboot). Checking device readiness... (000_start/101_run_pruning.pl)
ui: Upgrade in progress: ( 0% done.26 mins to reboot). Checking device readiness... (000_start/105_check_model_number.sh)
ui: Upgrade in progress: ( 0% done.26 mins to reboot). Checking device readiness... (000_start/107_version_check.sh)
ui: Upgrade in progress: ( 0% done.26 mins to reboot). Checking device readiness... (000_start/110_DB_integrity_check.sh)
ui: Upgrade in progress: ( 0% done.26 mins to reboot). Checking device readiness... (000_start/113_EO_integrity_check.pl)
ui: Upgrade in progress: ( 0% done.26 mins to reboot). Checking device readiness... (000_start/200_clean_csp_files.sh)
ui: Upgrade in progress: ( 0% done.26 mins to reboot). Checking device readiness... (000_start/250_check_system_files.sh)
ui: Upgrade in progress: ( 4% done.25 mins to reboot). Checking device readiness... (000_start/320_remove_backups.sh)
ui: Upgrade in progress: ( 4% done.25 mins to reboot). Checking device readiness... (000_start/400_run_troubleshoot.sh)

Disable SIP Inspection on Firepower through FlexConfig

Occasionally you may come across issues with SIP inspection on an ASA or Firepower, leading to problems with SIP/RTP voip audio. As a troubleshooting step, it’s often helpful to disable SIP inspection for testing.

Please read this note from Cisco on disabling SIP inspection to verify you everything in order before doing so:

You would typically disable SIP only if the inspection is causing problems in the network. However, if you disable SIP, you must ensure that your access control policies allow the SIP traffic (UDP/TCP 5060) and any dynamically allocated ports, and that you do not need NAT support for SIP connections. Adjust the access control and NAT policies accordingly through the standard pages, not through FlexConfig.

For Firepower devices managed by an FMC, here are some quick instructions to push out a FlexConfig policy to disable SIP inspection.

In FMC, navigate to Devices > FlexConfig

Click the Pencil icon to edit your FlexConfig device policy. If you don’t have a policy yet click New Policy to create one.

In the FlexConfig policy click the New FlexConfig Object.

Give a name a name and description for the new new object and in the text field copy the commands below (note the indentations). Click Save.

policy-map global_policy
class inspection_default
no inspect sip

Under available FlexConfig find the new object we created, highlight it, and click the left arrow to add it to the policy.

With the new object added to the policy, save the policy and deploy to your FirePower.

SSH to the Firepower and run the following command to verify that SIP is no longer in the inspection list:

show run policy-map | beg global_policy

policy-map global_policy
 class inspection_default
  inspect dns preset_dns_map
  inspect ftp
  inspect h323 h225
  inspect h323 ras
  inspect rsh
  inspect rtsp
  inspect sqlnet
  inspect skinny
  inspect sunrpc
  inspect xdmcp
  inspect netbios
  inspect tftp
  inspect icmp
  inspect icmp error

Usernames No Longer Appear in Firepower Management Center After Upgrading to 6.0

After upgrading our Firepower Management Center to 6.0, we noticed that usernames were no longer populating in our dashboards. Instead of showing users, all we could see was “No Authentication Required.”

sf-usernames01After opening a support case, TAC pointed me to the following bug: cscux39125 (cisco login required).

To resolve the issue we need to set the active directory domain to our domain’s NetBIOS short name in Firepower’s realm configuration.

To change your realm configuration go to System -> Integration -> Realms

Click Edit

sf-usernames02Go to Realm Configuration and edit the AD Primary Domain field to your domain’s NetBIOS short name.

sf-usernames03For more information see the following support forums post: https://supportforums.cisco.com/discussion/12879381/sourcefire-60-firesight-mc-60-users-not-populating

Installing a CA Signed SSL Certificate in SourceFire Defense Center 6.0

I don’t know about you, but self-signed certificates seem to trigger my IT OCD. When possible, I like to replace self-signed certs with one signed by our Active Directory CA. Here are the steps involved to replace the self-signed certificate on Cisco’s FirePOWER Management Center/SourceFire Defense Center with one signed by your internal Active Directory Certificate Authority.

  • In Defense Center, go to System -> Configuration -> HTTPS Certificate
  • Click “Generate New CSR”

sfcsr01

  • Fill out the Certificate Signing Request information, paying attention to the common name field. The common name should match the address you use to access defense center, e.g., defensecenter.domain.org

sfcsr02

  • Click generate, and copy/paste the certificate request output to notepad

sfcsr03

  • Next, navigate to your Certificate Services website and click “Request a Certificate”

sfcsr04

  • Click “Submit an advanced certificate request”

sfcsr05

  • Under “Saved Request,”paste your certificate request output from earlier and select the Web Server certificate template. Click Submit

sfcsr06

  • Download your newly generated certificate (Base64 encoded) and open it with your text editor of choice

sfcsr07sfcsr08

  • Copy the output of your cert and go back to Defense Center. Navigate to System -> Configuration -> HTTPS Certificate
  • Click Import HTTPS Certificate and paste your certificate information into “Server Certificate”

sfcsr01

sfcsr09

  • Click “Save” and you should now see your new certificate installed.
  • Reload Defense Center and you should now trust the web server (assuming of course you trust the root CA)

sfcsr10