Usernames No Longer Appear in Firepower Management Center After Upgrading to 6.0

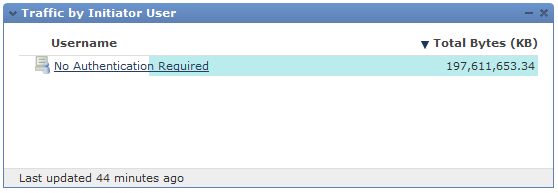
After upgrading our Firepower Management Center to 6.0, we noticed that usernames were no longer populating in our dashboards. Instead of showing users, all we could see was “No Authentication Required.”

sf-usernames01After opening a support case, TAC pointed me to the following bug: cscux39125 (cisco login required).

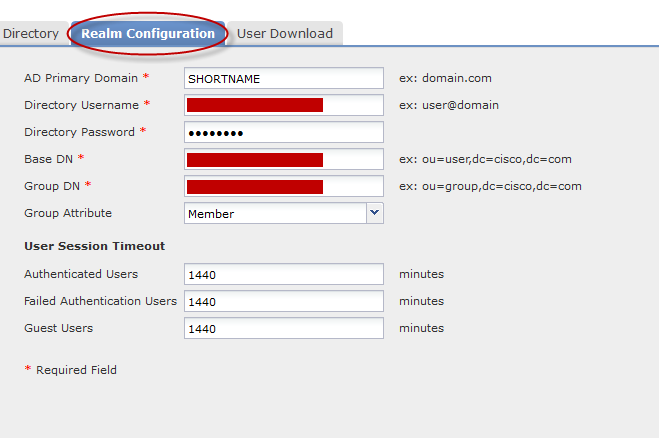
To resolve the issue we need to set the active directory domain to our domain’s NetBIOS short name in Firepower’s realm configuration.

To change your realm configuration go to System -> Integration -> Realms

Click Edit

sf-usernames02Go to Realm Configuration and edit the AD Primary Domain field to your domain’s NetBIOS short name.

sf-usernames03For more information see the following support forums post: https://supportforums.cisco.com/discussion/12879381/sourcefire-60-firesight-mc-60-users-not-populating

Installing a CA Signed SSL Certificate in SourceFire Defense Center 6.0

I don’t know about you, but self-signed certificates seem to trigger my IT OCD. When possible, I like to replace self-signed certs with one signed by our Active Directory CA. Here are the steps involved to replace the self-signed certificate on Cisco’s FirePOWER Management Center/SourceFire Defense Center with one signed by your internal Active Directory Certificate Authority.

  • In Defense Center, go to System -> Configuration -> HTTPS Certificate
  • Click “Generate New CSR”

sfcsr01

  • Fill out the Certificate Signing Request information, paying attention to the common name field. The common name should match the address you use to access defense center, e.g., defensecenter.domain.org

sfcsr02

  • Click generate, and copy/paste the certificate request output to notepad

sfcsr03

  • Next, navigate to your Certificate Services website and click “Request a Certificate”

sfcsr04

  • Click “Submit an advanced certificate request”

sfcsr05

  • Under “Saved Request,”paste your certificate request output from earlier and select the Web Server certificate template. Click Submit

sfcsr06

  • Download your newly generated certificate (Base64 encoded) and open it with your text editor of choice

sfcsr07sfcsr08

  • Copy the output of your cert and go back to Defense Center. Navigate to System -> Configuration -> HTTPS Certificate
  • Click Import HTTPS Certificate and paste your certificate information into “Server Certificate”

sfcsr01

sfcsr09

  • Click “Save” and you should now see your new certificate installed.
  • Reload Defense Center and you should now trust the web server (assuming of course you trust the root CA)

sfcsr10