Cisco ISE Deployment: OVF parameter chunkSize Error

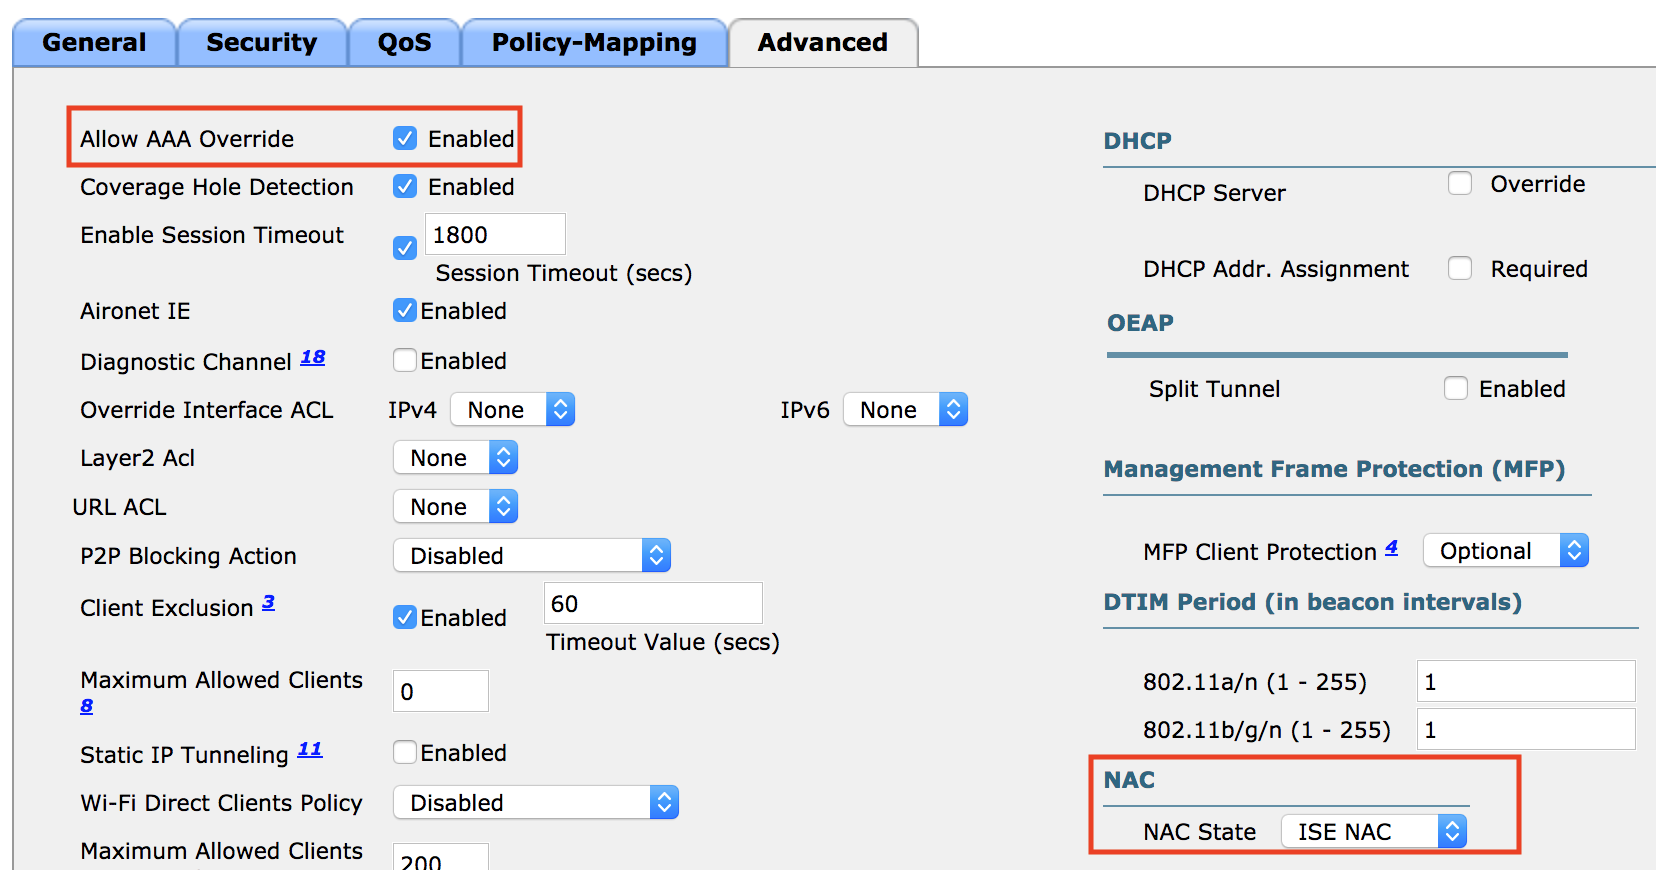
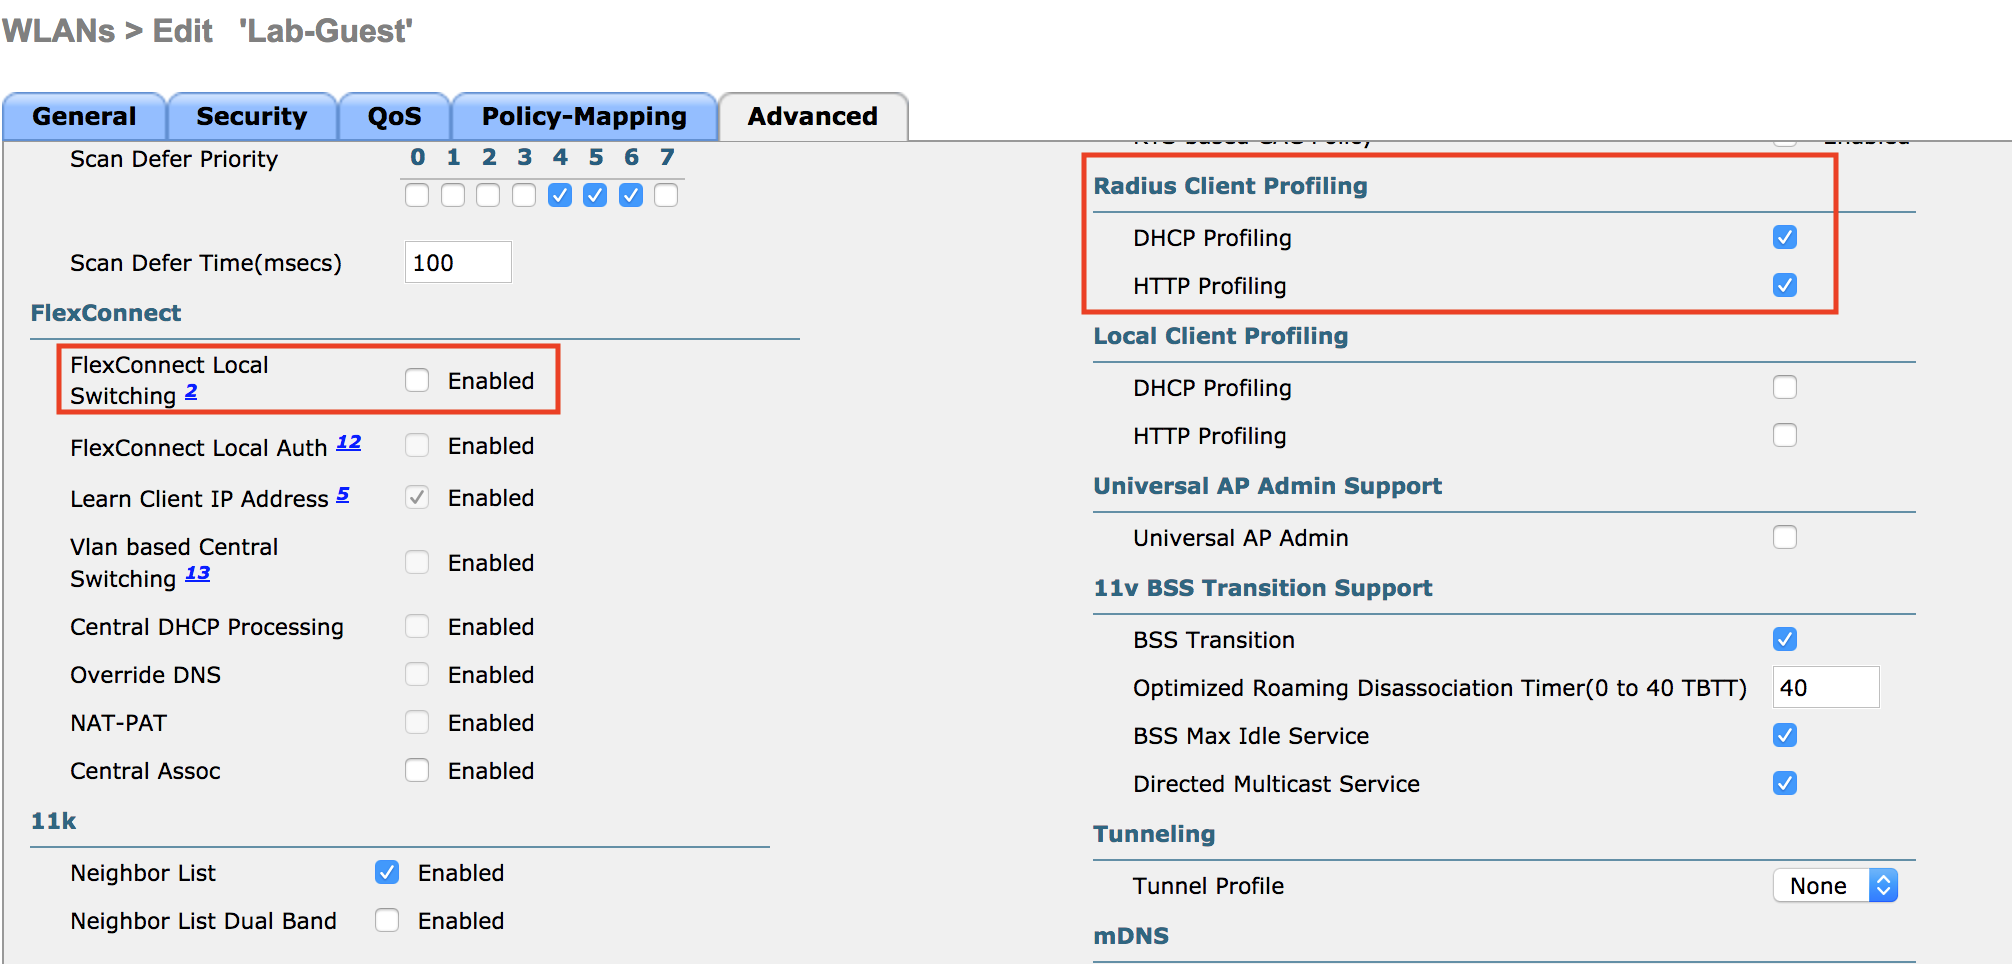
Ran into a fun issue with vCenter 6.5 and a deployment of ISE. When deploying the ISE ova template we received a chunk size error: “OVF parameter chunkSize with value XXXXXXXXXX” is currently not supported for OVF package import.

Thankfully a VMware kb article walks us through how to fix the issue.

https://kb.vmware.com/s/article/2148588?lang=en_US

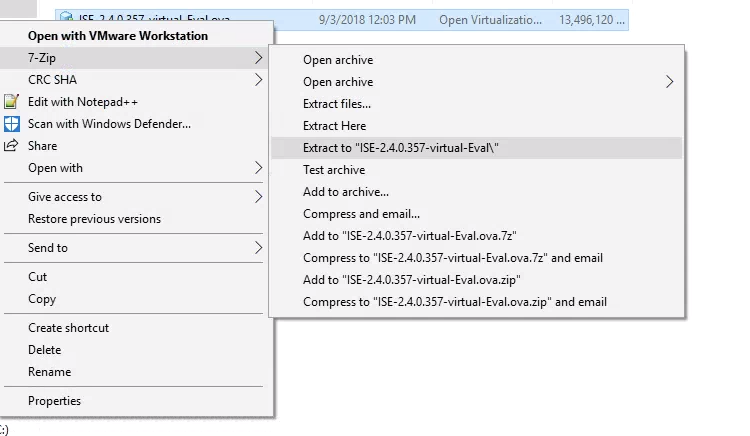
The first step is to unpack the ova file with a tool such as 7zip on Windows or tar on Linux/Mac.

Windows:

Linux/Mac:

tar xvf ISE-2.4.0.357-virtual-Eval.ova

Depending on the version of ISE you’re deploying there should be a number of vdmk files. On Linux/Mac we can use the cat command to combine these into one disk file. On windows the copy command will accomplish the same thing.

Windows:

copy /b ISE-2.4.0.357-virtual-Eval-disk1.vmdk.gz.000000000 + ISE-2.4.0.357-virtual-Eval-disk1.vmdk.gz.000000001 + ISE-2.4.0.357-virtual-Eval-disk1.vmdk.gz.000000002 + ISE-2.4.0.357-virtual-Eval-disk1.vmdk.gz.000000003 + ISE-2.4.0.357-virtual-Eval-disk1.vmdk.gz.000000004 + ISE-2.4.0.357-virtual-Eval-disk1.vmdk.gz.000000005 + ISE-2.4.0.357-virtual-Eval-disk1.vmdk.gz.000000006 ISE-2.4.0.357-virtual-Eval-disk1.vmdk

Linux/Mac:

cat ISE-2.4.0.357-virtual-Eval-disk1.vmdk.* > ISE-2.4.0.357-virtual-Eval-disk1.vmdk

Next we just have to edit the .ovf file to point to the new disk1 we created. Open the ovf in a text editor and find the chunk size attribute.

Original value:

< File ovf:href="ISE-2.4.0.357-virtual-Eval-disk1.vmdk" id="file1" size="13819990977" / >

chunkSize removed:

< File chunkSize="2147483648" compression="gzip" href="ISE-2.4.0.357-virtual-Eval-disk1.vmdk.gz" id="file1" size="13819990977" / >


Deploy your edited ovf and you should now be able to proceed with the ISE installation error free.

Cisco ISE: Fixing “Certificate Generation Failed” Error with Android Devices and Cisco Network Setup Assistant

Ran into some issues recently with Android devices and the Cisco Network Setup Assistant while attempting to provision certificates as part of the BYOD work flow.

While on-boarding an Android device, the following error occurred:

TAC pointed me to this helpful YouTube video that contained the solution.

Starting with Android 6, EST is natively used by the device for Certificate Signing Requests. To fix the issue we need to allow the EST authentication request through ISE. This can be accomplished with a new Authorization Policy that matches the EST request and then permits access.

  • To create the rule first navigate to Policy -> Policy Sets.
  • Select your wireless policy.
  • Expand your Authorization Policy.
  • Insert a new rule.
  • Give the rule a descriptive name.
  • Click + under conditions.
  • For Attribute we want Cisco: cisco-av-pair
  • For the Attribute Value we want est-csr-request=true

Your condition should look something like this:

  • Click Use.
  • Under Results -> Profile, select Permit Access.
  • Save your Authorization Policy.

Your new Policy should look something like this:

Try to enroll your android device again and you should now be successful in EST authentication and device provisioning.

Configuring Hotspot Guest Access with Cisco ISE

Been toying with the Cisco vWLC and ISE in the home lab. Evaluation copies of ISE can be found on Cisco’s box share here: https://cisco.app.box.com/v/ISE-Eval

Here are my notes on configuring a Guest Hotspot portal. Hotspots are a simple portal where users will need to accept an Acceptable Use Policy before being granted access to the internet.

Please also see the ISE Guest Access Deployment Guide from Cisco for more details on setting up different Guest Access scenarios: https://community.cisco.com/t5/security-documents/ise-guest-access-deployment-guide/ta-p/3640475

After installing vWLC and ISE, add ISE as a AAA server on the vWLC.

  • Log into the vWLC. Click the security tab at the top.
  • On the left hand menu click Authentication under Radius/AAA.
  • Click the New button to add a new AAA server.
  • Enter the IP address of the ISE server, be sure port number is 1812, and that Support for COA is checked. Create a Shared Secret and make note of it as ISE will need to be configured with the same secret. Click Apply.
  • Next click Accounting from the Security/AAA menu on the left. Hit New and enter the required information.

Next we will log into ISE and configure the WLC as a network device.

  • Go to Work Centers, then Network Resources.
  • Click Add and fill out the WLC information. Check Radius Auth. Settings and be sure to fill out the Shared Secret we filled out earlier in the WLC.

The next step is to configure our Guest WLAN/SSID.

  • Log into your WLC and click the WLANs tab. Choose Create New from the drop down box and click Go.
  • Enter a profile name and SSID.
  • Select Status Enabled, and the correct interface for your guest traffic.
  • Next click the Security tab.
  • Change Layer 2 Security to None, and check MAC Filtering.
  • Click AAA Servers, and change the Authentication and Authorization servers to the ISE server via the drop down boxes.

Click the Advanced tab.

Check Allow AAA Override.

Under NAC change the drop down to ISE NAC.

Uncheck Flex Connect Local Switching if enabled.

Check DHCP/HTTP profiling under Radius Client Profiling.

  • Click New, and for the ACL name type ACL_WEBAUTH_REDIRECT
  • Click Apply, then click the ACL name to start editing.
  • Click Add New Rule.
  • Create a rule allowing destination DNS (udp/53) from any to any.
  • Create a rule allowing source DNS from any to any.
  • Create a rule allowing tcp from ISE to any.
  • Create a rule allowing tcp from any to ISE.
  • Note: In production you would want to limit the DNS entries to just your trusted DNS server.
  • Create a new ACL if you’d like to place any restrictions on your guest network. e.g., blocking access to any private IP space.

Next we’ll create ISE policies to redirect users who connect to the Guest network to a web portal. Once the AUP has been accepted they will get a new policy applied to them restricting their access to internet only via the ACL we created earlier. We’re going to be using the default hotspot portal but you can design your own portals with custom graphics. Cisco also has an ISE portal builder which has an excellent WYSIWYG editor to make custom portal building a snap. The portal builder requires a Cisco login and can be found here: https://isepb.cisco.com/#/

  • Log in to ISE. Go to Work Centers, Guest Access, Policy Elements.
  • Click Results and and go to Authorization Profiles.
  • Click Add to create a new profile.
  • Give the policy a descriptive name and description.
  • Scroll down a bit in the Common Tasks and check Web Redirection.
  • Select Hotspot from the drop down. Enter ACL_WEBAUTH_REDIRECT as the ACL and the value will be the Hotspot guest portal (if you’ve uploaded a customer portal you can select it here).
  • Click Submit.
  • Click Add again, enter a new name and description. This policy will apply the guest restriction ACL we created on the WLC.
  • Scroll down into the Common Tasks and find Airespace ACL, enter the name of the Guest ACL you created earlier. Click Submit.
  • Now, go to Work Centers, Guest Access, Policy Sets.

  • Expand the Default policy set by clicking the arrow on the right.
  • Expand the Authentication Policy be clicking the arrow.
  • Find MAB (MAC Address Bypass) and expand the options menu. Be sure the option for “If User not found” is set to Continue.
  • Next we’ll create our new Authorization Polices for the Guest network. Expand Authorization Policy and select a space to insert the polices. Locate a rule and click the gear, select insert above or below rule to place the new policies where you’d like them.
  • Enter a name for the policy. Select Wireless_MAB as the condition, and Guest_Hotspot as the Profile.
  • Add a new profile above the one we just created
  • This will be for applying the Guest ACL for the user once going through the portal. Conditions will be Wireless_MAB, IdentityGroup = GuestEndpoints, and Guest_Flow. Result will be the Guest_Access policy we created which applies the ACL we created on the WLC.
  • Click Save.

This should be enough configuration to get the Guest Hotspot SSID up and running. Connecting to the new SSID should pop up the AUP, once accepted you should then have access to the internet.

Configuring CIMC on a Cisco UCS C Server

Just got in a new UCS C server and was going through the process of configuring Cisco’s flavor of out of band management called CIMC or Cisco Integrated Management Controller. Similar to HP’s iLO or Dell’s iDrac, CIMC allows one to remotely control and manage their server via the web or SSH with handy tools like integrated KVM and ISO mounting.

  • To configure CIMC, connect your keyboard/monitor and power up the server.
  • Press F8 when the Cisco logo appears.

  • When configuring CIMC for the first time it may ask for a user/password. Try admin/password or admin/Cisco1234
  • Enter a new password when prompted.
  • Use your arrow keys to navigate the menus. Press SPACE to select/deselect options.
  • When completed press F10 to save your settings, wait 45 seconds and hit F5 to refresh and verify the settings you entered.
  • Hit ESC to exit.
  • You should now be able to access the CIMC web GUI by going to HTTPS://CIMC_IP/


Converting a Mobility Express AP into a CAPWAP AP

I was recently installing some Cisco 2802 APs and came across an issue where one of the APsĀ  would grab a DHCP address, be reachable for a minute, and then drop off the network.

It turns out the AP having an issue actually had the Mobility Express image installed and needed to be converted to CAPWAP, even though we purchased the APs specifically with the CAPWAP SKU. Here are the troubleshooting steps I went through to convert the AP to CAPWAP.

After rebooting the AP a number of times to see if it would work, I threw a console cable on the device and saw some interesting output.

[*04/12/2017 00:08:21.4871] 
[*04/12/2017 00:08:21.7248] waiting for POE negotiation to complete
[*04/12/2017 00:08:21.7248] 
[*04/12/2017 00:08:26.4876] waiting for POE negotiation to complete
[*04/12/2017 00:08:26.4876] 
[*04/12/2017 00:08:26.7252] waiting for POE negotiation to complete
[*04/12/2017 00:08:26.7252] 
[*04/12/2017 00:08:27.8015] 
[*04/12/2017 00:08:27.8015] !!!!! {/usr/bin/capwap_brain} failed writing /click/fromdevs_check_gw/color len 1 data: "0"
[*04/12/2017 00:08:27.8016] ethernet_port wired0, ip 192.168.1.2, netmask 255.255.255.255, gw 192.168.1.2, mtu 1500, bcast 192.168.1.255, dns1 0.0.0.0, dns2 8.8.8.8, domain sascs.org
[*04/12/2017 00:08:27.8123] !!!!! {/usr/bin/capwap_brain} failed writing /click/gw_h/nat/firewall_ssh_sw/sw len 1 data: "0"
[*04/12/2017 00:08:27.9885] chatter: tohost_virtual :: ToHost: device 'virtual' went down

I rebooted the device again and came to this screen indicating that it was indeed in Mobility Express mode.

(Cisco Controller) 

Cisco Aironet 2800 Series Mobility Express
Welcome to the Cisco Wizard Configuration Tool
Use the '-' character to backup

To reset the AP into CAPWAP mode you’ll need to enter enable mode on the CLI and enter the “ap-type capwap” command.

XXXX#ap-type capwap
AP is the Master AP, system will need a reboot when ap type is changed to CAPWAP
. Do you want to proceed? (y/N)
y
[*04/12/2017 00:17:01.1466] Cleaning ME configf any..
[*04/12/2017 00:17:01.1685] Cleaning config files..
[*04/12/2017 00:17:01.1765] AP Type changed: ME to CAPWAP. AP Mode changed to local mode. AP Rebooting...
[*04/12/2017 00:17:01.1819] AP Rebooting: Reset Request from Controller(AP Type Changed from ME to CAPWAP)

The AP then rebooted, got its DHCP address, and successfully connected to the controller.

Documentation from Cisco to convert an AP from Mobility Express to CAPWAP can be found here:

https://www.cisco.com/c/en/us/td/docs/wireless/controller/technotes/8-2/b_Mobility_Express_Deployment_guide/b_Mobility_Express_Deployment_guide_chapter_01100.html#task_CD04E8319602439D973B7D7ACE23111D