Upgrading IOS-XE 3.X to IOS-XE Denali 16.X

IOS-XE Denali represents Cisco’s effort to bring a single code base across their enterprise line of networking equipment, meaning the same operating system will run Catalyst, ISR, and ASR platforms.

IOS-XE 3.7 will be the “end of the track” for the 3.X train of code on Catalyst 3650/3850… so to speak.

Below are the steps I used to upgrade a 3850 from IOS-XE 03.06.03E to IOS-XE 16.3.5b Denali. The switches were in “install mode” and these steps are specific for that method. To check your mode you can issue a show version command and look under the Mode column. 3850s should come from the factory in install mode; bundle mode is similar to the older upgrade method where you boot from a monolithic bin file. More info on install mode and bundle mode can be found here.

Switch Ports Model              SW Version        SW Image              Mode   
------ ----- -----              ----------        ----------            ----   
*    1 56    WS-C3850-48P       03.06.03E         cat3k_caa-universalk9 INSTALL

If you’re looking to free up some space to copy over your new version you can run a software clean command to clean up any unused packages.

[1]: % flash: requires 526972 KB of free space, but only 124364 KB is available. Operation aborted.
[1]: % An internal error was encountered. Operation aborted.
3850#software clean
Preparing clean operation ...
[1]: Cleaning up unnecessary package files
[1]: No path specified, will use booted path flash:packages.conf
[1]: Cleaning flash:
[1]: Preparing packages list to delete ...
     In use files, will not delete:
       cat3k_caa-base.SPA.03.06.03E.pkg
       cat3k_caa-drivers.SPA.03.06.03E.pkg
       cat3k_caa-infra.SPA.03.06.03E.pkg
       cat3k_caa-iosd-universalk9.SPA.152-2.E3.pkg
       cat3k_caa-platform.SPA.03.06.03E.pkg
       cat3k_caa-wcm.SPA.10.2.131.0.pkg
       packages.conf
[1]: Files that will be deleted:
    cat3k_caa-base.SPA.03.03.04SE.pkg
    cat3k_caa-base.SPA.03.03.05SE.pkg
    cat3k_caa-drivers.SPA.03.03.04SE.pkg
    cat3k_caa-drivers.SPA.03.03.05SE.pkg
    cat3k_caa-infra.SPA.03.03.04SE.pkg
    cat3k_caa-infra.SPA.03.03.05SE.pkg
    cat3k_caa-iosd-universalk9.SPA.150-1.EZ4.pkg
    cat3k_caa-iosd-universalk9.SPA.150-1.EZ5.pkg
    cat3k_caa-platform.SPA.03.03.04SE.pkg
    cat3k_caa-platform.SPA.03.03.05SE.pkg
    cat3k_caa-universalk9.SPA.03.03.05.SE.150-1.EZ5.bin
    cat3k_caa-universalk9.SPA.03.06.03.E.152-2.E3.bin
    cat3k_caa-wcm.SPA.10.1.140.0.pkg
    cat3k_caa-wcm.SPA.10.1.150.0.pkg
    packages.conf.00-
    packages.conf.01-
    packages.conf.02-

[1]: Do you want to proceed with the deletion? [yes/no]: yes
[1]: Clean up completed

Copy over your new ios version via any support method (usb, tftp, scp, etc.). We’ll use the software install set of commands with the force and new flags since we’re going from 3.X up to 16.X. Once completed type yes to initiate your reload. There is some micro code upgrades that may take some time so you’re looking at about 10+ minutes of down time.

3850#software install file flash:cat3k_caa-universalk9.16.03.06.SPA.bin force new
Preparing install operation ...
[1]: Starting install operation 
[1]: Expanding bundle usbflash0:cat3k_caa-universalk9.16.03.05b.SPA.bin
[1]: Copying package files
[1]: Package files copied
[1]: Finished expanding bundle usbflash0:cat3k_caa-universalk9.16.03.05b.SPA.bin
[1]: Verifying and copying expanded package files to flash:
[1]: Verified and copied expanded package files to flash:
[1]: Starting compatibility checks
[1]: Bypassing peer package compatibility checks due to 'force' command option
[1]: Finished compatibility checks
[1]: Starting application pre-installation processing
[1]: Finished application pre-installation processing
[1]: Old files list:
    Removed cat3k_caa-base.SPA.03.06.03E.pkg
    Removed cat3k_caa-drivers.SPA.03.06.03E.pkg
    Removed cat3k_caa-infra.SPA.03.06.03E.pkg
    Removed cat3k_caa-iosd-universalk9.SPA.152-2.E3.pkg
    Removed cat3k_caa-platform.SPA.03.06.03E.pkg
    Removed cat3k_caa-wcm.SPA.10.2.131.0.pkg
[1]: New files list:
    Added cat3k_caa-guestshell.16.03.05b.SPA.pkg
    Added cat3k_caa-rpbase.16.03.05b.SPA.pkg
    Added cat3k_caa-rpcore.16.03.05b.SPA.pkg
    Added cat3k_caa-srdriver.16.03.05b.SPA.pkg
    Added cat3k_caa-wcm.16.03.05b.SPA.pkg
    Added cat3k_caa-webui.16.03.05b.SPA.pkg
[1]: Creating pending provisioning file
[1]: Finished installing software.  New software will load on reboot.
[1]: Committing provisioning file

[1]: Do you want to proceed with reload? [yes/no]: yes
[1]: Reloading

<Thu Mar 29 18:09:24 2018> Message from sysmgr: Reason Code:[3] Reset Reason:Reset/Reload requested by [stack-manager]. [User requested reload]
umount: /proc/fs/nfsd: not mounted
Unmounting ng3k filesystems...
Unmounted /dev/sda3...
Warning! - some ng3k filesystems may not have unmounted cleanly...
Please stand by while rebooting the system...
Restarting system.


Booting...Initializing and Testing RAM ++++@@@@####...################################++@@++@@++@@++@@++@@++@@++@@++@@++@@++@@++@@++@@++@@++@@++@@++@@done.
Memory Test Pass!

Base ethernet MAC Address: bc:67:1c:7e:e4:00

Interface GE 0 link down***ERROR: PHY link is down
Initializing Flash...

flashfs[7]: 0 files, 1 directories
flashfs[7]: 0 orphaned files, 0 orphaned directories
flashfs[7]: Total bytes: 6784000
flashfs[7]: Bytes used: 1024
flashfs[7]: Bytes available: 6782976
flashfs[7]: flashfs fsck took 1 seconds....done Initializing Flash.

Interrupt within 5 seconds to abort boot process.


Interrupt within 5 seconds to abort boot process.
Getting rest of image
Reading full image into memory....done
Reading full base package into memory...: done = 22301472
Nova Bundle Image
--------------------------------------
Kernel Address    : 0x6042e384
Kernel Size       : 0x34e9e1/3467745
Initramfs Address : 0x6077cd65
Initramfs Size    : 0x119d5bb/18470331
Compression Format: mzip

Bootable image at @ ram:0x6042e384
Bootable image segment 0 address range [0x81100000, 0x81b8adc0] is in range [0x80180000, 0x90000000].
@@@@@@@@@@@@@@@@@@@@@@@@@@@@@@@@@@@@@@@@@@@@@@@@@@@@@@@@@@@@@@@@@@@@@@@@@@@@@@@@@@@@@@@@@@@@@@@@@@@@@boot_system: 380
Loading Linux kernel with entry point 0x816902d0 ...
Bootloader: Done loading app on core_mask: 0xf

### Launching Linux Kernel (flags = 0x5)


%IOSXEBOOT-5c8e9d6656e9d89a8dedeae457871084-new_cksum: (rp/0): 4
%IOSXEBOOT-5c8e9d6656e9d89a8dedeae457871084-saved_cksum: (rp/0): 4
%IOSXEBOOT-Thu-###: (rp/0): Mar 29 18:14:25 Universal 2018 PLEASE DO NOT POWER CYCLE ### BOOT LOADER UPGRADING 4
%IOSXEBOOT-loader-boot: (rp/0): upgrade successful 4


Front-end Microcode IMG MGR: found 4 microcode images for 1 device.
Image for front-end 0: /tmp/microcode_update/front_end/fe_type_6_0
Image for front-end 0: /tmp/microcode_update/front_end/fe_type_6_1
Image for front-end 0: /tmp/microcode_update/front_end/fe_type_6_2
Image for front-end 0: /tmp/microcode_update/front_end/fe_type_6_3

Front-end Microcode IMG MGR: Preparing to program device microcode...
Front-end Microcode IMG MGR: Preparing to program device[0]...594412 bytes.... Skipped[0].
Front-end Microcode IMG MGR: Preparing to program device[0]...393342 bytes.
Front-end Microcode IMG MGR: Programming device 0...rwRrrrrrrw..0%.........................................................................10%........................................................................20%..........................................................................30%........................................................................40%..........................................................................50%........................................................................60%.........................................................................70%..........................................................................80%........................................................................90%..........................................................................100%
Front-end Microcode IMG MGR: Preparing to program device[0]...25186 bytes.
Front-end Microcode IMG MGR: Programming device 0...rrrrrrw..0%....10%....20%......30%...40%......50%....60%......70%...80%......90%....100%wRr!
Front-end Microcode IMG MGR: Microcode programming complete for device 0.
Front-end Microcode IMG MGR: Preparing to program device[0]...86370 bytes.... Skipped[3].
Front-end Microcode IMG MGR: Microcode programming complete in 246 seconds

Both links down, not waiting for other switches
Switch number is 1


              Restricted Rights Legend

Use, duplication, or disclosure by the Government is
subject to restrictions as set forth in subparagraph
(c) of the Commercial Computer Software - Restricted
Rights clause at FAR sec. 52.227-19 and subparagraph
(c) (1) (ii) of the Rights in Technical Data and Computer
Software clause at DFARS sec. 252.227-7013.

           cisco Systems, Inc.
           170 West Tasman Drive
           San Jose, California 95134-1706


Cisco IOS Software [Denali], Catalyst L3 Switch Software (CAT3K_CAA-UNIVERSALK9-M), Version 16.3.5b, RELEASE SOFTWARE (fc1)
Technical Support: http://www.cisco.com/techsupport
Copyright (c) 1986-2017 by Cisco Systems, Inc.
Compiled Thu 02-Nov-17 11:07 by mcpre


Upgrading a Cisco Wireless LAN Controller

After being recently tasked to upgrade a Cisco Wireless LAN Controller I figured I’d document the process for future reference.
You’ll need either a tftp, ftp, or sftp server as well as the code you’re upgrading the WLC to and the FUS upgrade if necessary.
Some notes on the different requirements:

  • Code can be downloaded to the WLC by either TFTP, FTP, or SFTP.
  • Configuration can be uploaded from the WLC by either TFTP, FTP, or SFTP.
  • Please be aware of the types of access points the version of WLC code supports. Older APs are often unsupported in newer versions of code. For example the WLC i’m upgrading needs to support AIR-LAP1142N-A-K9 access points which are not compatible with release 8.4.X and up, meaning the newest code I could upgrade to is 8.3.140.0. Check the Cisco Wireless Solutions Software Compatibility Matrix to find out what version of code is supported for your APs.
  • It’s also recommended you check the TAC Recommended AireOS Builds to see if the version of code you selected is recommended by TAC or if there may be any bugs you might run into. When in doubt grab the gold star release from Cisco.
  • When downloading your WLC software update check to see if there is a Field Upgrade Software (FUS) package available. The FUS contains various system-related component upgrades (bootloaders, field recovery images, etc.). More info about FUS can be found here.

Before upgrading any software be sure to create a back up of your WLC config.

The following commands configure the upload mode (tftp, ftp, or sftp), what to back up, and where to back it up to.

(wlc1) >transfer upload mode sftp
(wlc1) >transfer upload username sftp
(wlc1) >transfer upload password sftp
(wlc1) >transfer upload datatype config
(wlc1) >transfer upload filename WLC-BACKUP
(wlc1) >transfer upload path .
(wlc1) >transfer upload serverip  X.X.X.X
(wlc1) >transfer upload start

After making a back up of our configuration we may also want to make note of the APs currently joined to the WLC as well as current version of code running.

(wlc1) >show AP join stats summary all 

Number of APs.................................... 166

(wlc1) >show sysinfo 

Manufacturer's Name.............................. Cisco Systems Inc.
Product Name..................................... Cisco Controller
Product Version.................................. 8.0.140.0
RTOS Version..................................... 8.0.140.0
Bootloader Version............................... 8.0.100.0
Emergency Image Version.......................... 8.0.100.0

Now we can configure the transfer method to download the FUS update to the WLC and then reboot the system to apply the update.

(wlc1) >transfer download mode sftp
(wlc1) >transfer download datatype code
(wlc1) >transfer download username sftp
(wlc1) >transfer download password sftp
(wlc1) >transfer download serverip X.X.X.X
(wlc1) >transfer download path .
(wlc1) >transfer download filename AIR-CT8500-K9-2-0-0-0-FUS.aes
(wlc1) >transfer download start


Mode............................................. SFTP
Data Type........................................ Code          
SFTP Server IP................................... X.X.X.X
SFTP Server Port................................. 22
SFTP Path........................................ /
SFTP Filename.................................... AIR-CT8500-K9-2-0-0-0-FUS.aes
SFTP Username.................................... sftp
SFTP Password.................................... *********

This may take some time.
Are you sure you want to start? (y/N) y

(wlc1) > reset system

The system has unsaved changes.
Would you like to save them now? (y/N) y

The system will reboot and apply the FUS update. Keep in mind that this process may take up to 30 – 60 minutes in total.

After applying the FUS update we can follow the same procedure to upload the WLC code.

(wlc1) >transfer download mode sftp
(wlc1) >transfer download datatype code
(wlc1) >transfer download username sftp
(wlc1) >transfer download password sftp
(wlc1) >transfer download serverip X.X.X.X
(wlc1) >transfer download path .
(wlc1) >transfer download filename AIR-CT8500-K9-8-3-140-0.aes
(wlc1) >transfer download start


Mode............................................. SFTP
Data Type........................................ Code          
SFTP Server IP................................... X.X.X.X
SFTP Server Port................................. 22
SFTP Path........................................ /
SFTP Filename.................................... AIR-CT8500-K9-8-3-140-0.aes
SFTP Username.................................... sftp
SFTP Password.................................... *********

This may take some time.
Are you sure you want to start? (y/N) y

Reset the system to apply the update by issuing the reset system command.

You can also have the APs predownload the new software before rebooting your controller. This is useful in large environments where you want to minimize downtime as there is a maximum amount of controllers that can concurrently connect to the WLC to upgrade their software after rebooting the controller.

(wlc1) > config ap image predownload primary

(wlc1) > show ap image all

After rebooting your controller do a show sysinfo to verify your software version.

(wlc1) >show sysinfo 

Manufacturer's Name.............................. Cisco Systems Inc.
Product Name..................................... Cisco Controller
Product Version.................................. 8.3.140.0
RTOS Version..................................... 8.3.140.0
Bootloader Version............................... 8.1.133.7
Emergency Image Version.......................... 8.1.133.7


COBRAS unable to import voice mail into CUC 11.5(SU3)

COBRAS is an excellent utility from Cisco that makes upgrading/migrating Cisco Unity Connection installations a walk in the park, letting one jump from version to version without having to run incremental upgrades (see: https://www.cisco.com/c/en/us/support/docs/unified-communications/unity-connection/118350-technote-cuc-00.html).

I recently ran into an issue with COBRAS failing to import voice mails into a fresh install of Unity Connection 11.5(SU3).

After opening a TAC case it was discovered that COBRAS cannot connect using IMAP on secure port 7883. To resolve the issue, a zero cost UC Encryption License needs to installed in PLM.

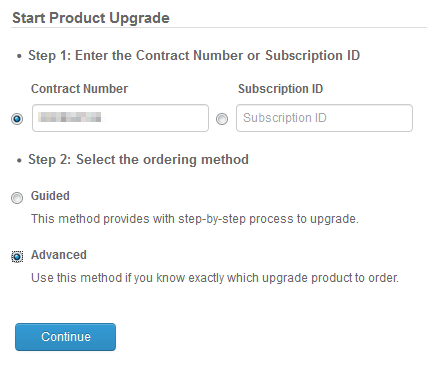
The UC Encryption License can be requested through Cisco’s Product Upgrade Tool.

Allow up to 24 hours for the request to be completed and install the license into PLM and synchronize your servers.

After synchronizing, run the following command in the CUC CLI:

admin:utils cuc encryption enable
After successful execution, restart the following services on all nodes in the cluster:
 1. Connection Conversation Manager
 2. Connection IMAP Server
Do you want to proceed (yes/no)? yes

Encryption enabled successfully

Then restart the following services from Cisco Unity Connection Serviceability:

  • Connection Conversation Manager
  • Connection IMAP Server

After restarting those services COBRAS was able to successfully import voice mail.


https://www.cisco.com/c/en/us/td/docs/voice_ip_comm/connection/11x/install_upgrade/guide/b_11xcuciumg/b_11xcuciumg_chapter_0101.html


Configuring SIP Integration Between CUCM and Unity Connection

Below are the steps to configure SIP integration between CUCM and Unity Connection. This is now the Cisco recommended best practice and replaces the legacy CTI Route Point configuration.

Create New SIP Trunk Security Profile

  • In CUCM, navigate to System > Security > SIP Trunk Security Profile

  • Click Add New

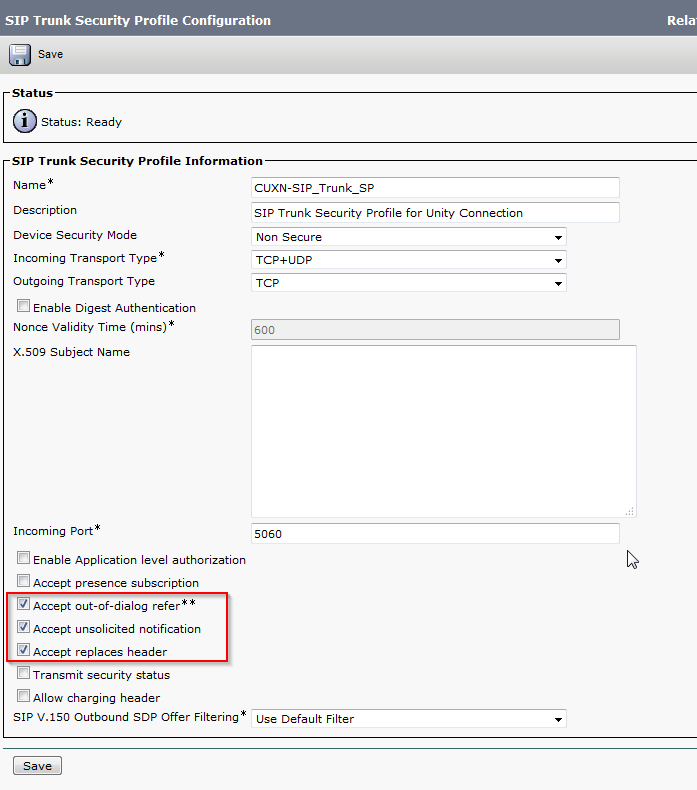
  • Enter a Profile Name and Description, check Accept Out-of-Dialog REFER, Accept Unsolicited Notification, Accept Replaces Header. Click Save.

Create a SIP Profile

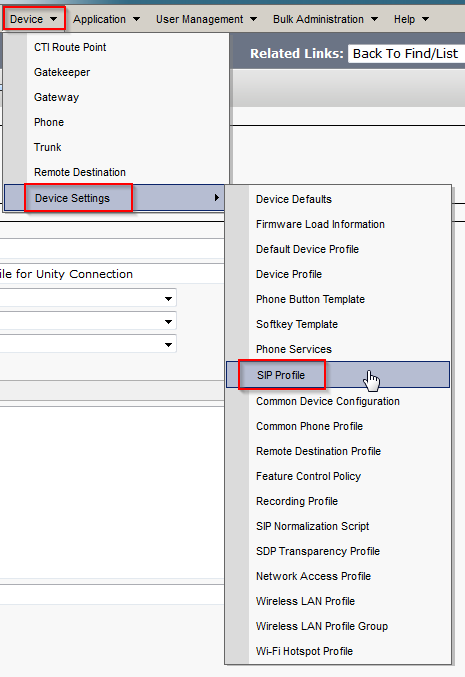
  • In CUCM, navigate to Device > Device Settings > SIP Profile

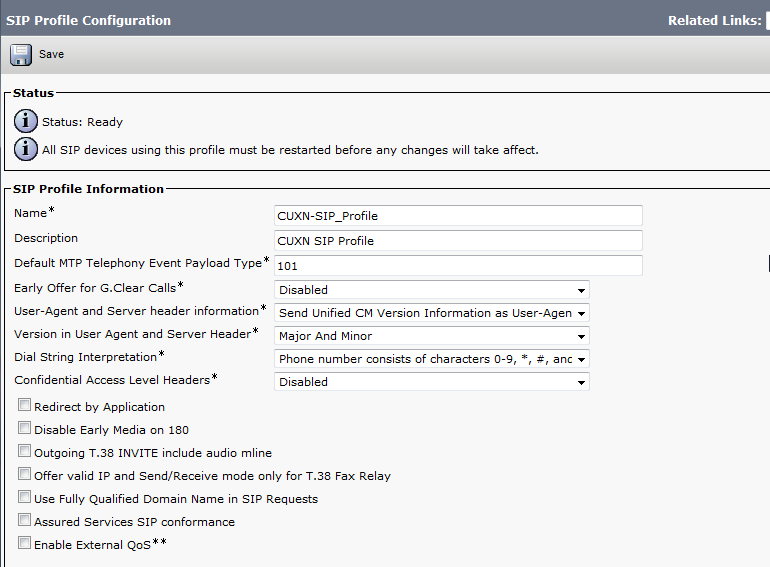
  • To right of Standard SIP Profile click Copy.

  • Enter a Name and Description for the SIP Profile. I also like to enable SIP OPTIONS Ping, this will let you know if the SIP Trunk has been established, and for how long it has been up, on the Find and List Trunks page. Click Save when completed.

Create SIP Trunk

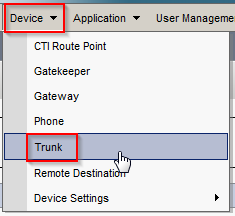
  • In CUCM, navigate to Device > Trunk.

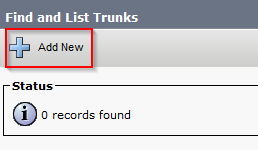
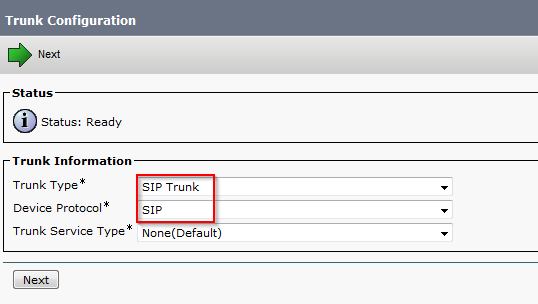
  • Click Add New, select SIP Trunk and SIP from the drop down menus and click Next.

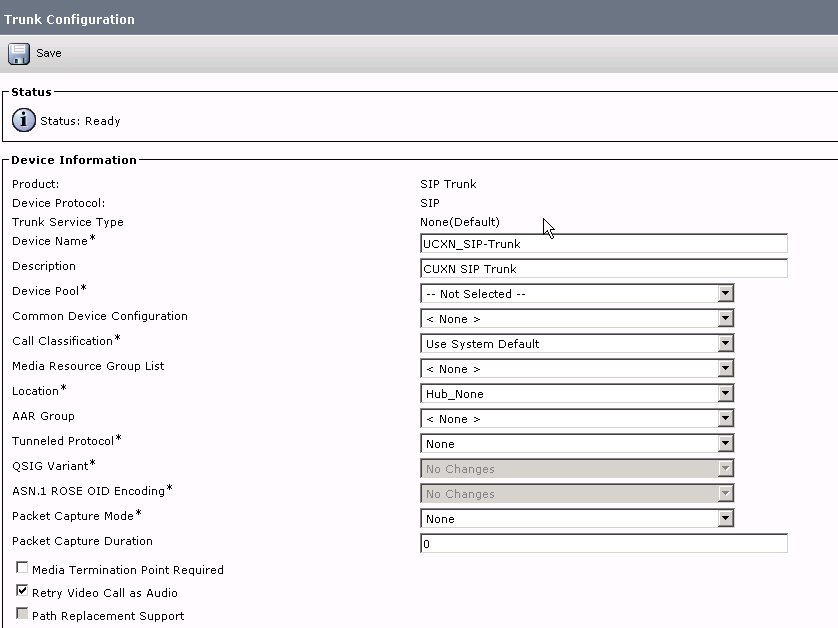
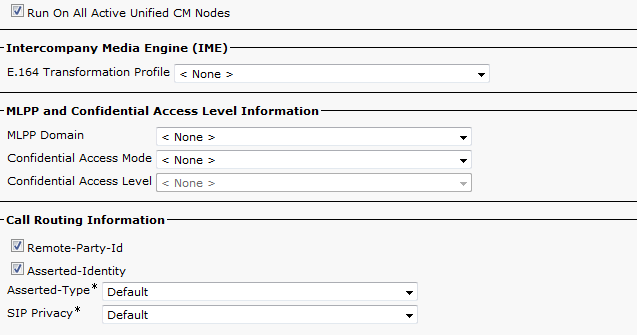
  • Enter a Device Name and Description. Select the proper Device Pool for the Trunk. Check Run On All Active Unified CM Nodes.

  • Under Inbound Calls select the CSS for inbound CUXN if you have one and check Redirecting Diversion Header Delivery – Inbound.

  • Under Outbound Calls, check Redirecting Diversion Header Delivery – Outbound
  • Be sure to set a Rerouting Calling Search Space to ensure the calls can be transferred from Unity back to CUCM.
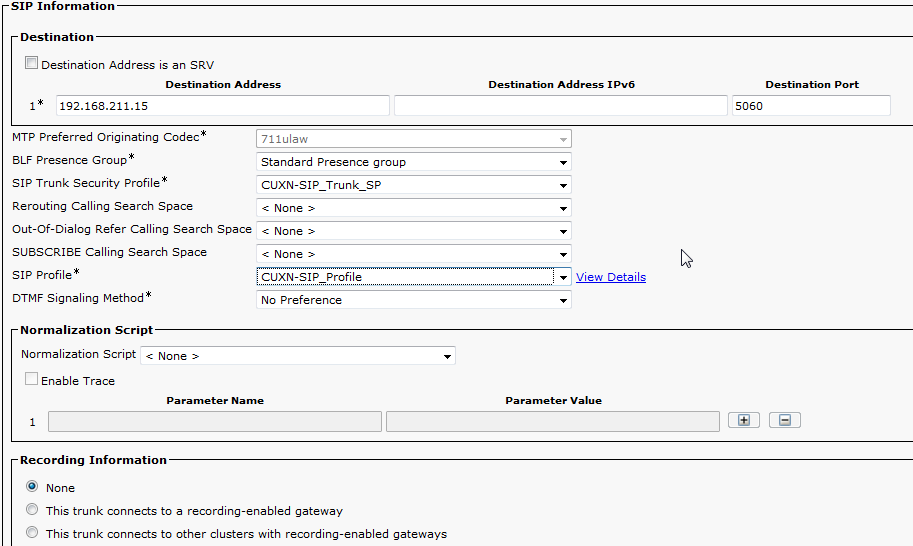
  • Under SIP Information enter the Destination Address of the Unity Connection Publisher. This can be an IP address or DNS name. Change the SIP Trunk Security Profile to the new profile we made earlier. Change the SIP Profile to the profile we made earlier. Click Save.

Create Route Group

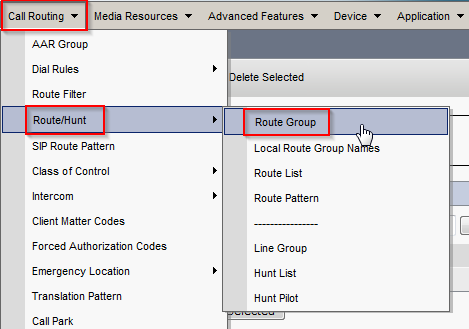
  • In CUCM, navigate to Call Routing > Route/Hunt > Route Group. Click Add New.

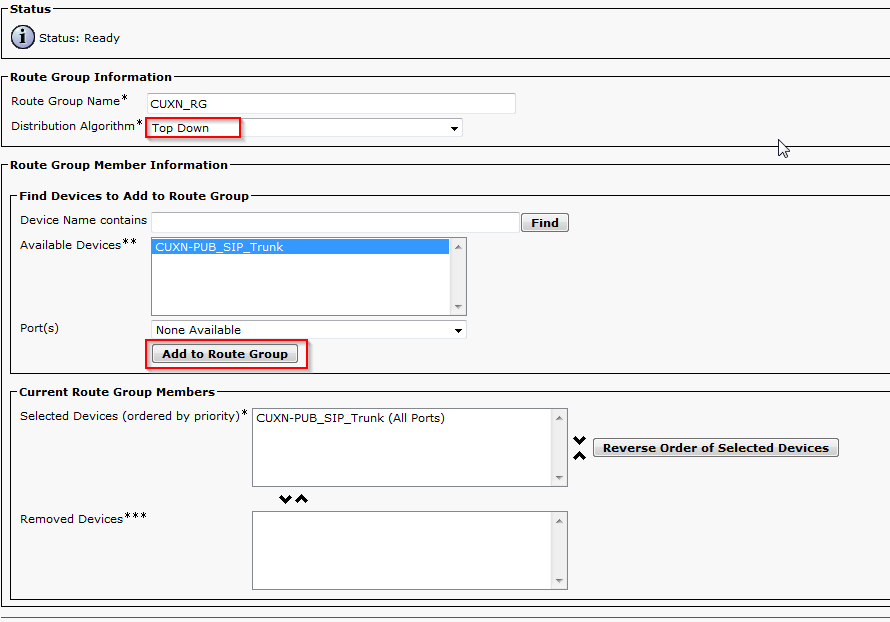
  • Enter a name for the Route Group, change Distribution Algorithm to Top Down. Find the newly created SIP trunk under Find Devices and click Add to Route Group. Click Save.

Create Route List

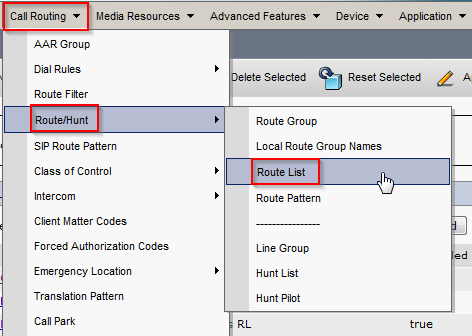
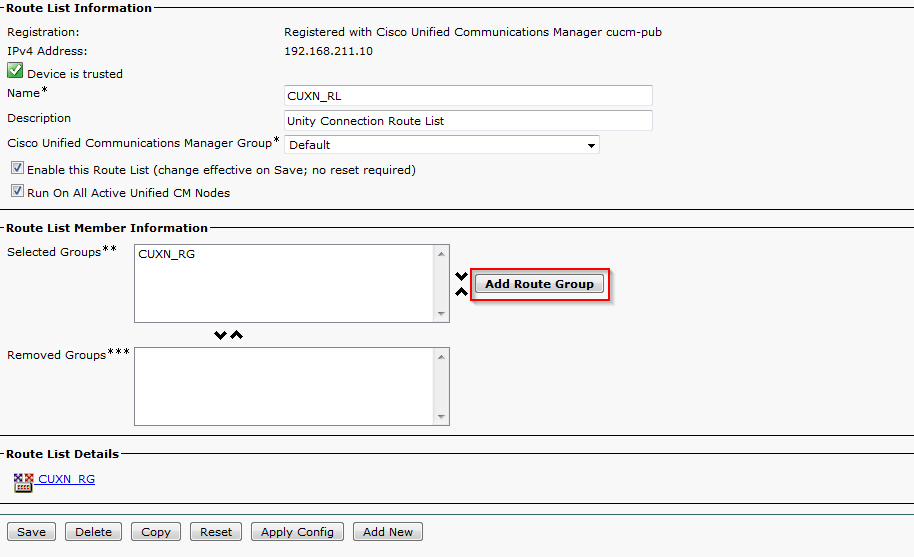
  • In CUCM, navigate to Call Routing > Route/Hunt > Route List. Click Add New.

  • Enter a name for the Route List and click Save.

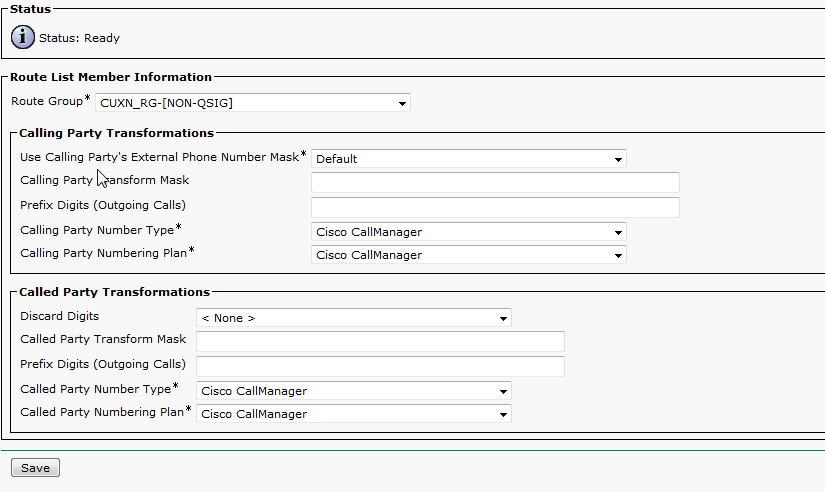
  • Click Add Route Group. Select the previously configured Route Group from the drop down menu and click Save.

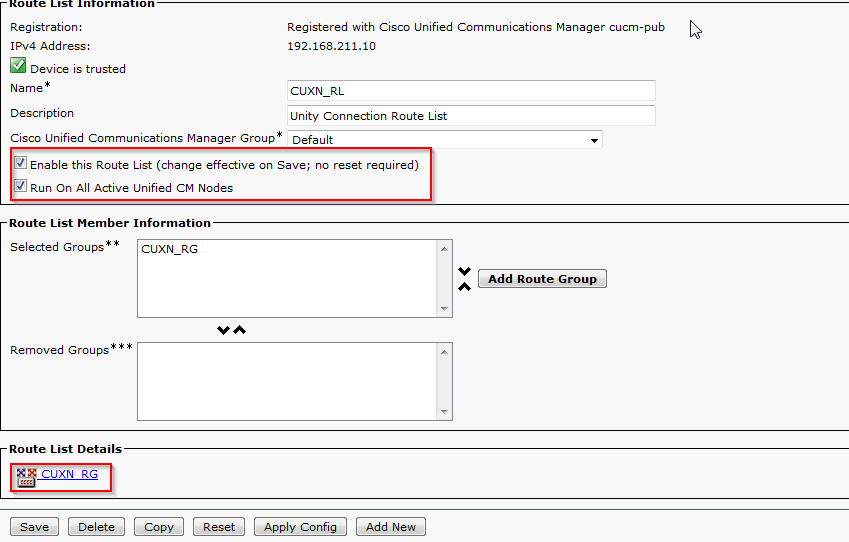
  • Confirm that Enable This Route List and Run On All Active Unified CM Nodes are checked and that the correct Route List is displayed under Route List Details. Click Save.

Create Route Pattern

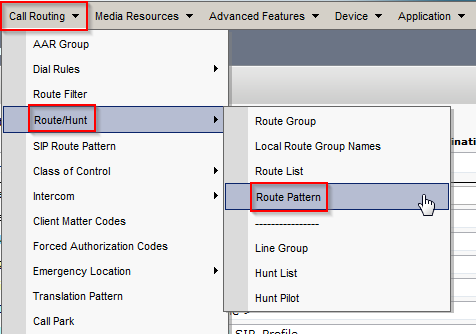
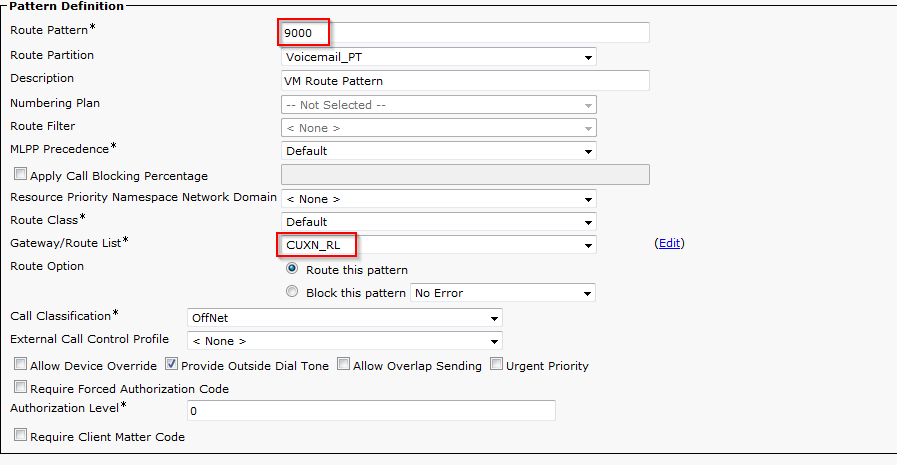
  • In CUCM, navigate to Call Routing > Route/Hunt > Route Pattern. Click Add New.

  • Enter the voicemail pilot number you’d like to use under Route Pattern. Select the name of the Route List we configured earlier under Gateway/Route List. Click Save.

Create Voice Mail Pilot

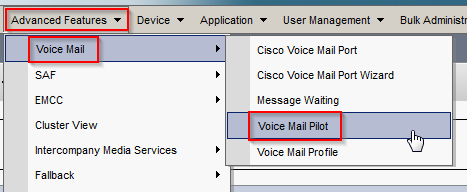
  • In CUCM, navigate to Advanced Features > Voice Mail > Voice Mail Pilot. Click Add New.

  • Enter the Voice Mail Pilot number, this should match the Route Pattern we created earlier. Enter the Calling Search Space and Description, check Make this default… and click Save.

Create Voice Mail Profile

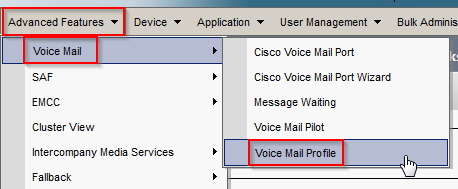
  • In CUCM, navigate to Advanced Features > Voice Mail > Voice Mail Profile. Click Add New.

  • Enter a Voice Mail Profile Name and Description. Select the Voice Mail Pilot configured earlier. Check Make this the default… if you want this profile to be the system default. Click Save.

Configure Unity Connection

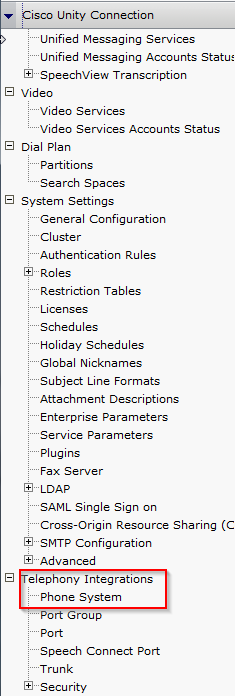
  • In CUC, navigate to Telephony Integration and then click Phone System.


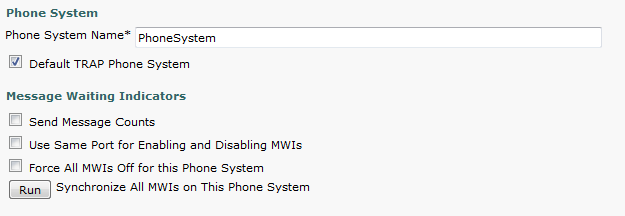
  • Click the default phone system and make any changes you’d like such as the Phone System Name.

  • At the top right of the Phone System Basics page look for Related Links. Select Add Port Group and click Go.

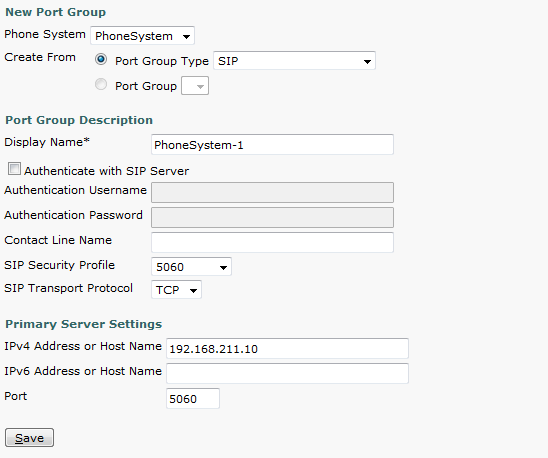
  • Under Create From, change the Port Group Type to SIP from the drop down box. Give the Port Group a Display name. Under Primary Server settings enter the IP address of the CUCM server. Click Save.

  • Under Related Links on the Port Group Basics page, select Add Ports and click Go.

  • Enter the number of Ports and click Save.

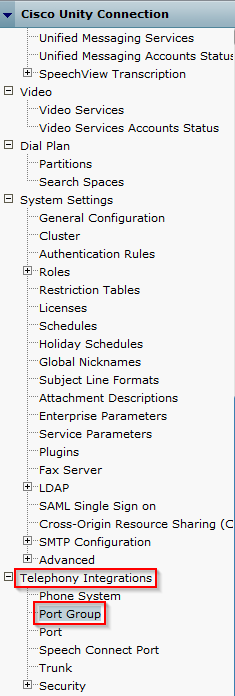
  • Navigate to the Port Group Basics by going to Telephony Integrations > Port Group > and click the newly created port group.

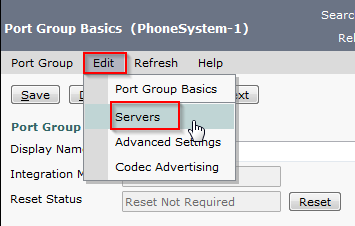
  • Click Edit and select Servers.

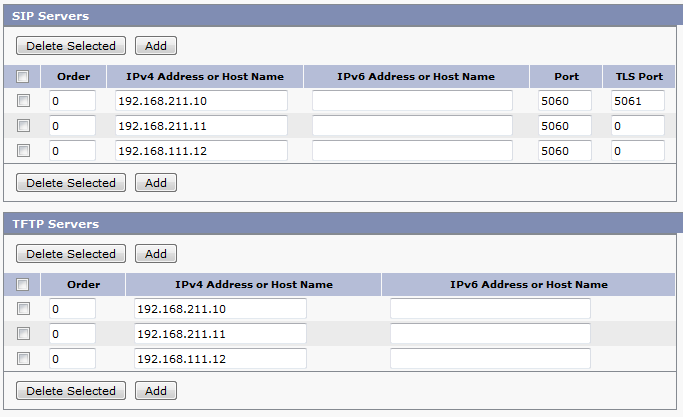
  • If you need to add secondary CUCM servers enter them under SIP servers. Follow the same steps to add additional TFTP servers.

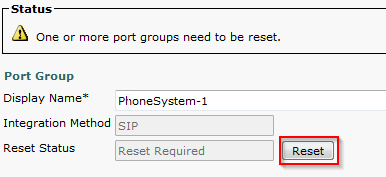
  • Click Edit > Port Group Basics. Click Reset to reset the Port Group.

Test and Verify

This should be enough to configure basic SIP integration between CUCM and CUC. In CUCM you can navigate to Devices > Trunk and verify that the SIP trunk has been established. You can then test by dialing the voice mail pilot number and seeing if you hit Unity Connection.


Upgrading Cisco Emergency Responder 8.6 to 10.5 (Physical to Virtual)

I was recently tasked with upgrading Cisco Emergency Responder 8.6 to 10.5. The 8.6 install just so happened to be on a physical IBM MCS server so I thought I’d document the steps of upgrading a physical install of CER 8.6 to a virtual CER 10.5 install, along with the software used to complete the upgrade.

  • Log in to Disaster Recovery System by selecting it from the drop down box located on the top right of the CER login page and clicking Go.

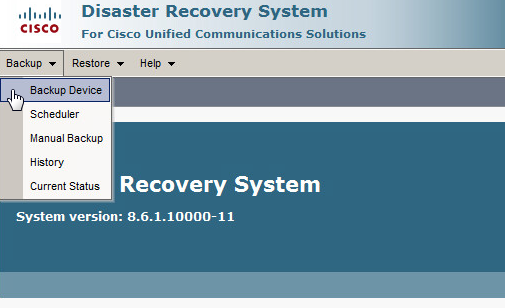
  • Select the Backup Menu and then navigate to Backup Device.

DRS uses SFTP to securely transport the backup records. If you have a SFTP server already setup in your environment you can use that to create a manual up-to-date back up. For this upgrade, a SFTP server was unavailable so I had to use my laptop as the back up device. The software I used to accomplish this task was freeSSHd. These next steps are an overview on how to configure freeSSHd as a backup device for DRS.

  • Open freeSSHd and click the Users tab and then click Add to configure a backup user.

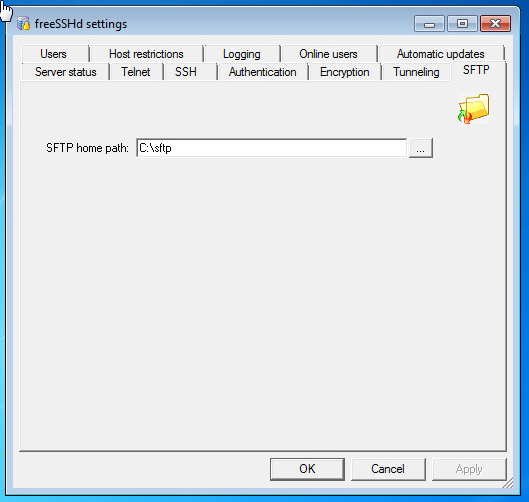
  • Click the SFTP tab and set the SFTP home path, the directory where the backup files will be stored.

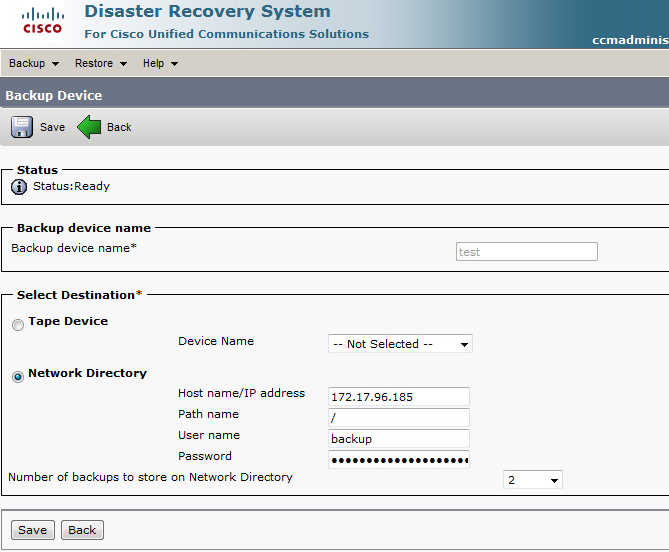
Now that freeSSHd is configured we can go back to DRS and configure the Backup Device.

  • Give the Backup device a name, IP, path, and the username and password you configured in freeSSHd.

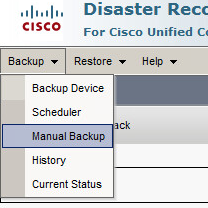
  • Once the backup device is configured click the Backup menu and select Manual Backup.

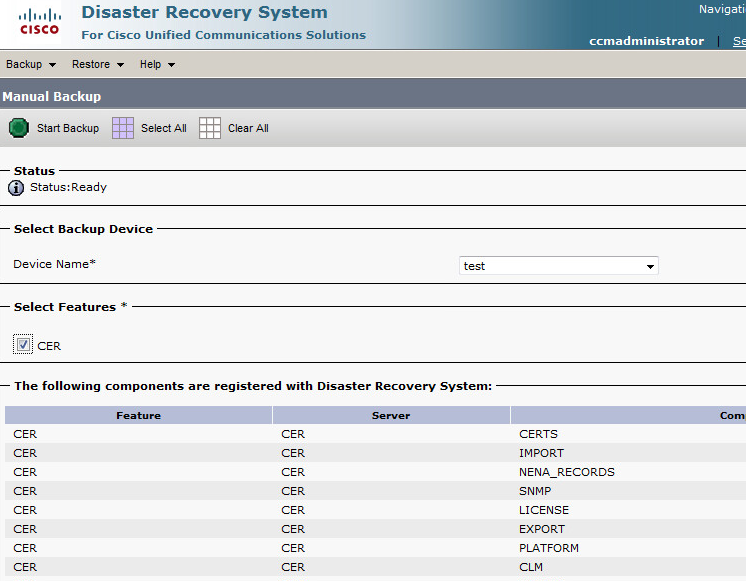
  • Select the device you configured and click CER to back up all registered CER components.

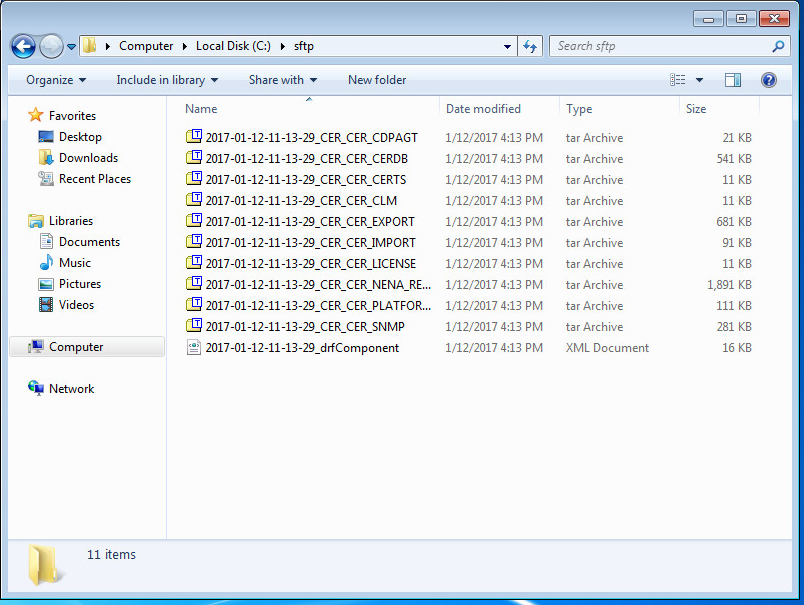
  • Click Start Backup, if everything is configured successfully you should see the progress bar advance and a number of tar archives will now be in your SFTP directory.

With a backup of the existing physical 8.6 install in place, we can now migrate to a virtual install of CER 8.6. The vmware ova and install media for CER 8.6 are unfortunately not on the Cisco downloads page. However, if you open a TAC case for assistance with a P2V migration, Cisco will make the download available to you.

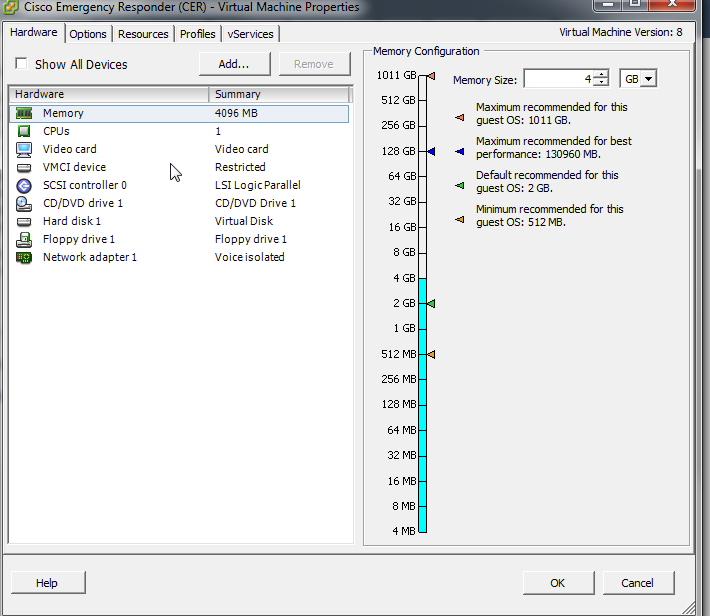
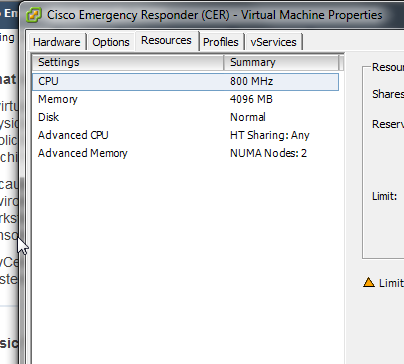
After you import the 8.6 ova you may also want to adjust the virtual machine properties so that CER 10.5 will be supported without issues. Increasing the memory to 4 GB, increasing the CPU resources, etc.

Follow the on screen instructions to complete the basic CER install (if you want re-IP CER, now would be the time to do that, or if you want to keep the same IP address please be sure that the virtual CER is on an isolated network). Once completed head to the web interface and select Disaster Recovery System.

  • Create your backup device on the by going to Backup > Backup Device.

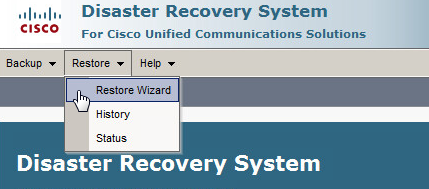
  • Go to the Restore menu and select Restore Wizard.

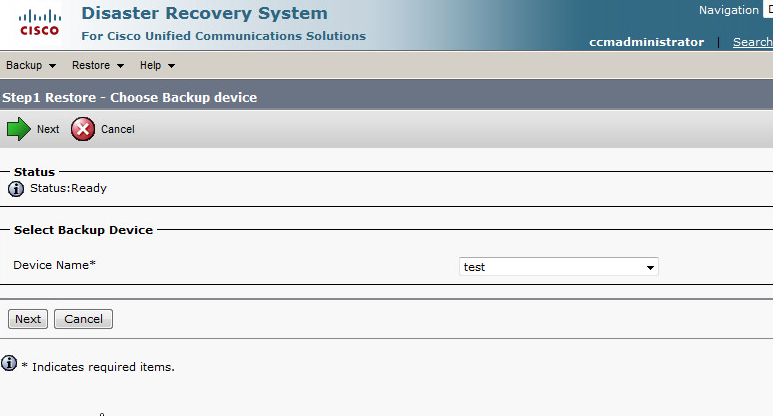
  • Select your Backup Device and click next.

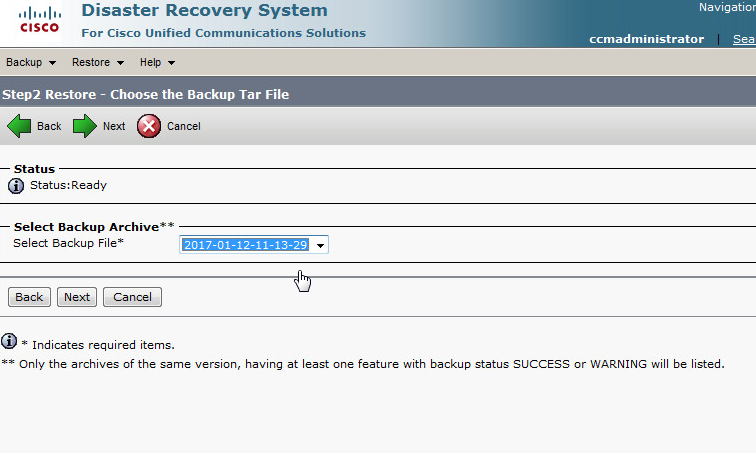
  • Select your Backup Archive and click next.

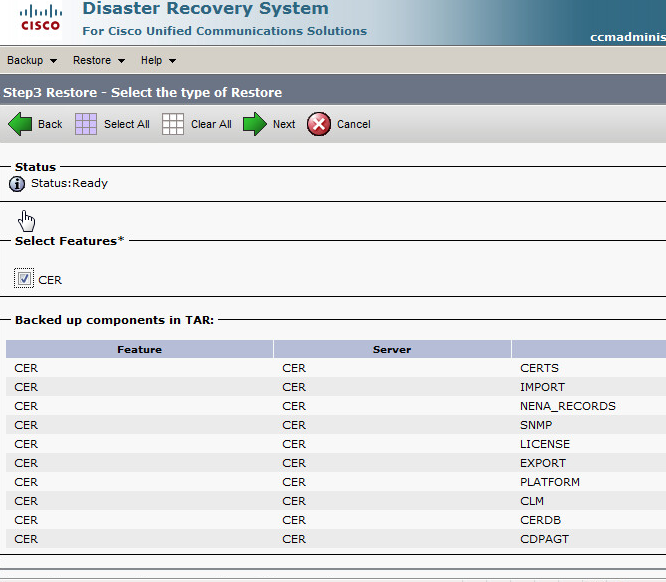
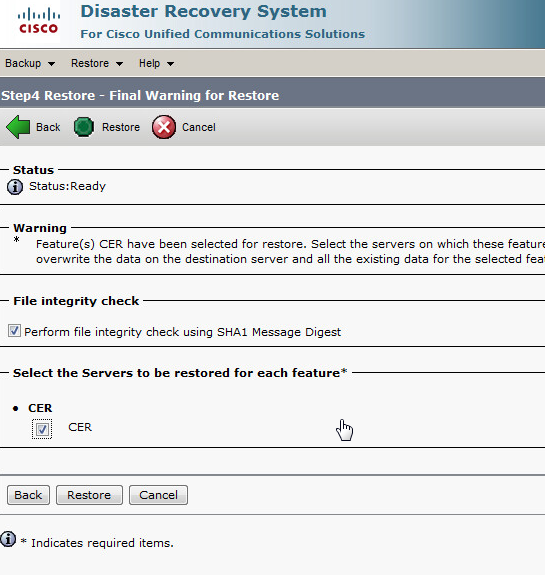
  • Select the features you’d like to restore and click next.

  • Select File integrity check and the servers to be restored then click Restore.


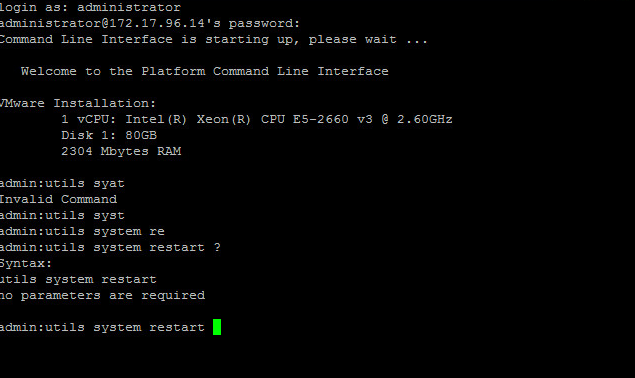
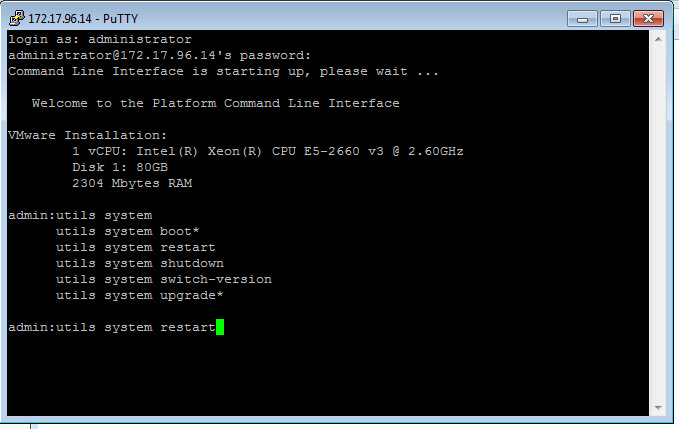
  • Wait for the restore process to finish. Once completed you will need to reboot the virtual machine by SSH’ing into the server and issuing the utils system restart command.

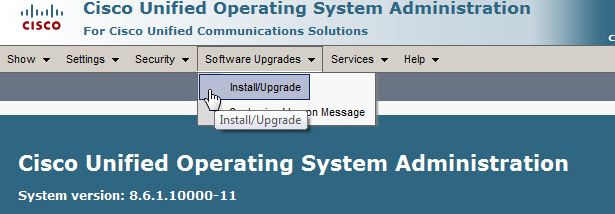
  • Next we can begin the upgrade process. Select Cisco Unified OS Administration from the navigation drop down menu and click Go. Select the Software Upgrades menu and click Install/Upgrade.

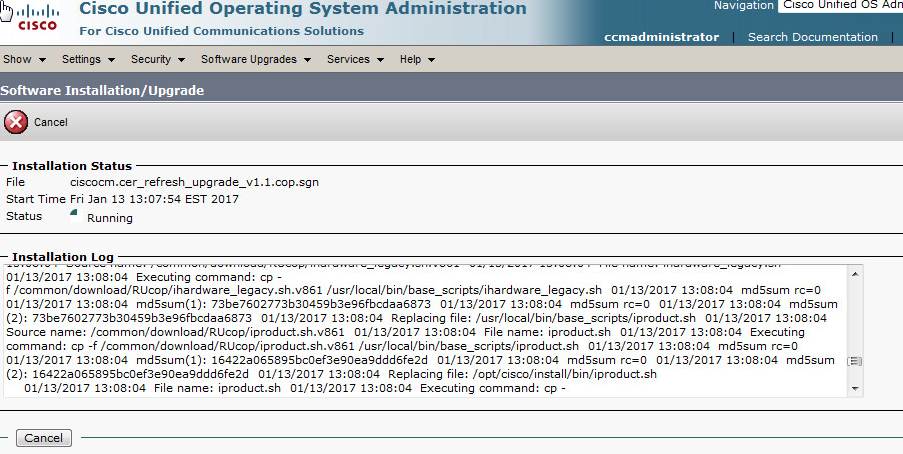
  • First we need to install ciscocm.cer_refresh_upgrade_v1.1.cop.sgn, a Cisco Options Package that is necessary to upgrade from 8.6 to 10.5. The file can be downloaded from Cisco and will need to be placed in your SFTP directory.
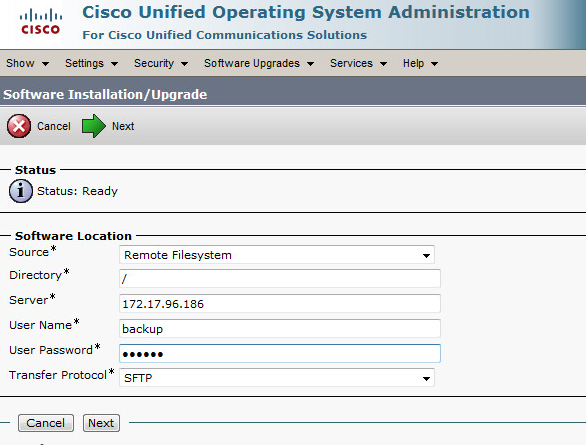
  • Select Remote Filesystem as the software source.
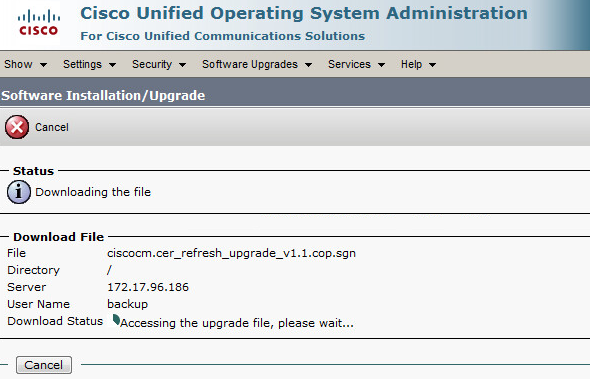
  • Configure the Software Location to point to your PC running freeSSHd then click next.

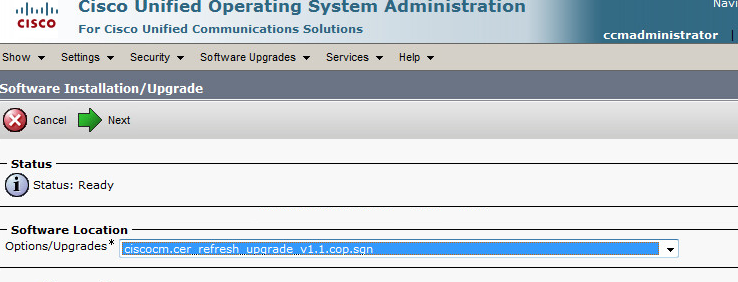
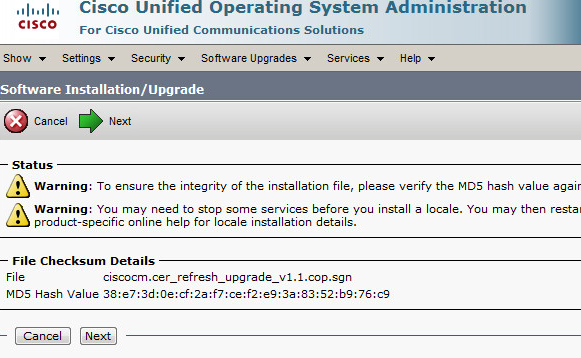
  • Under Software Location select ciscocm.cer_refresh_upgrade_v1.1.cop.sgn and click next.

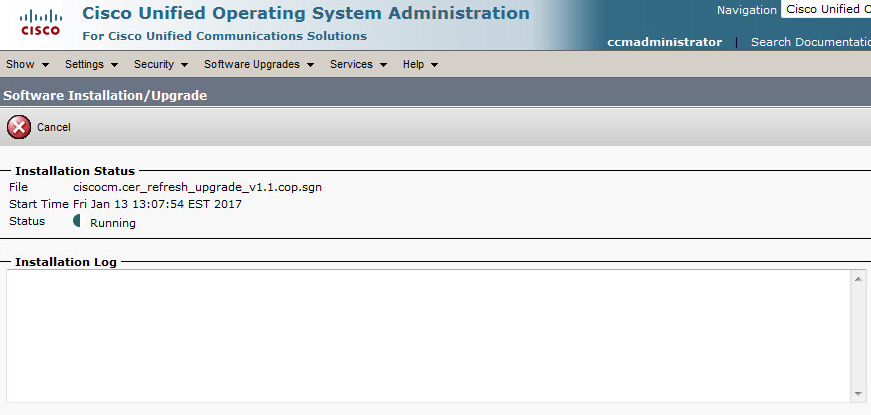
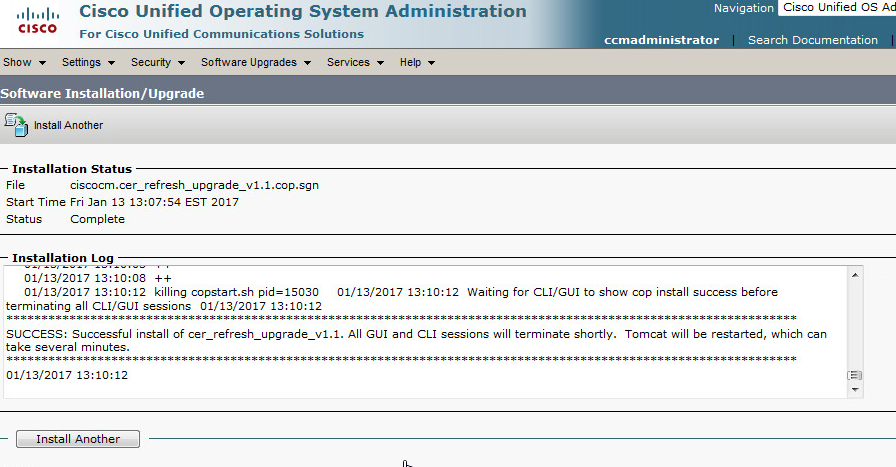
  • You should then see the install progress.

  • Reboot the system.

  • Next, mount the 10.5 install media on the virtual machine. Select Connected and Connected at power on.

  • Select Cisco Unified OS Administration from the navigation drop down menu and click Go. Select the Software Upgrades menu and click Install/Upgrade.
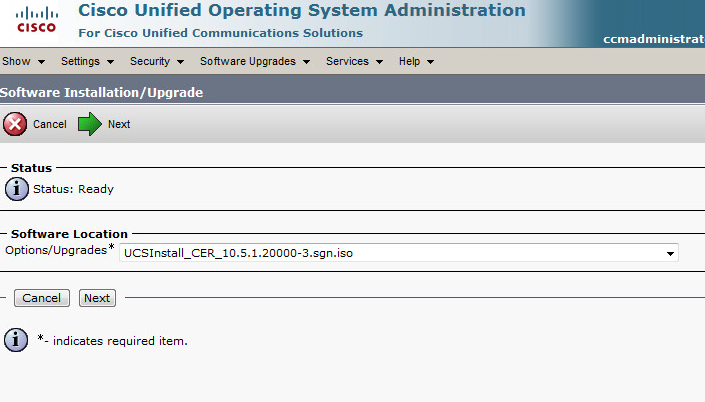
  • Select DVD/CD as the software source and click next.

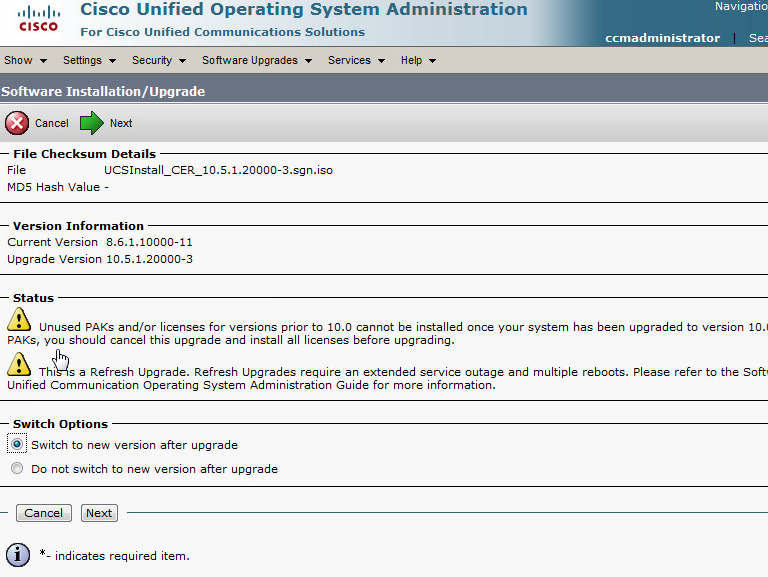
  • Be sure the correct software version is displayed and click next.

  • Select your Switch options and click next.

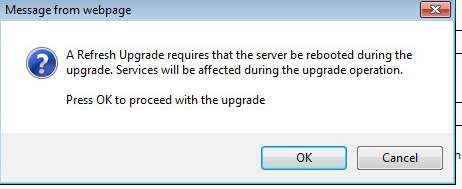
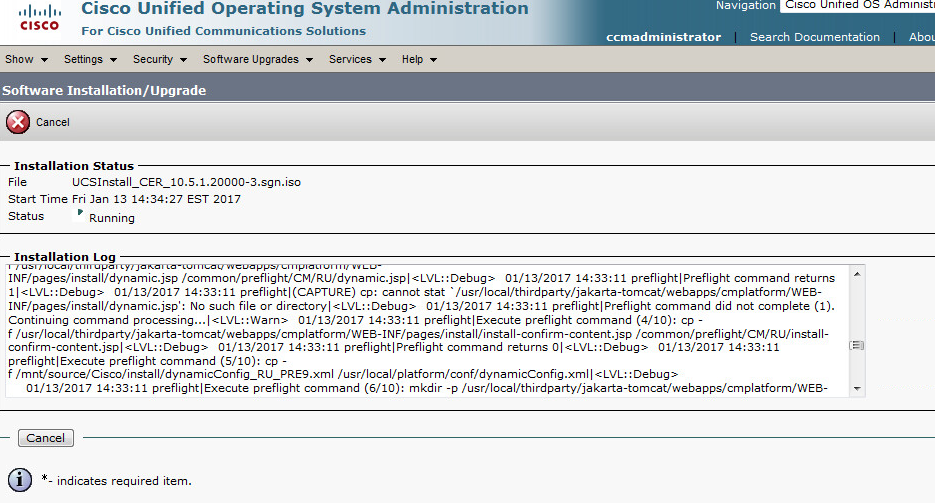
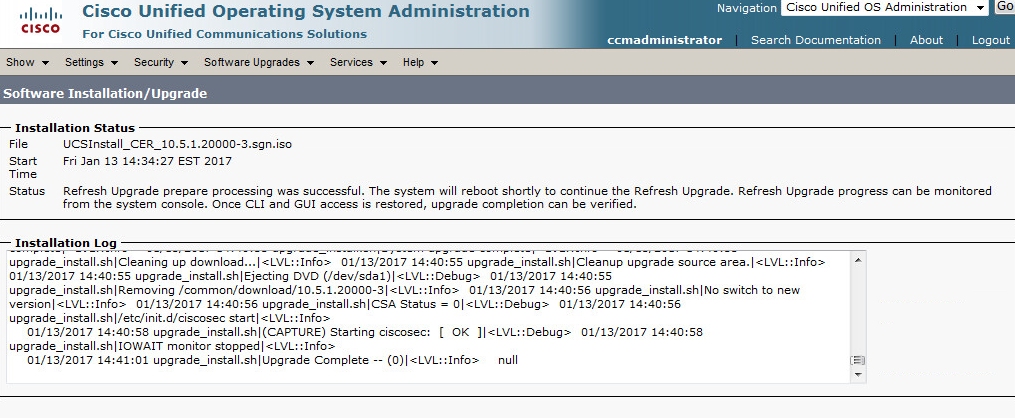
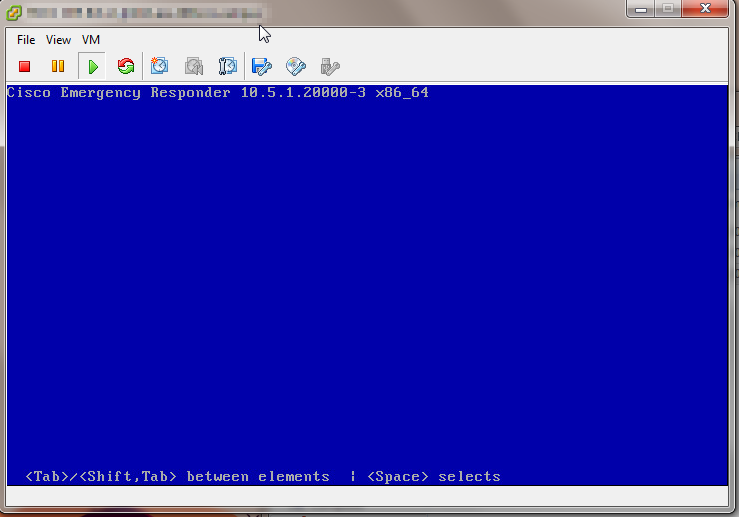
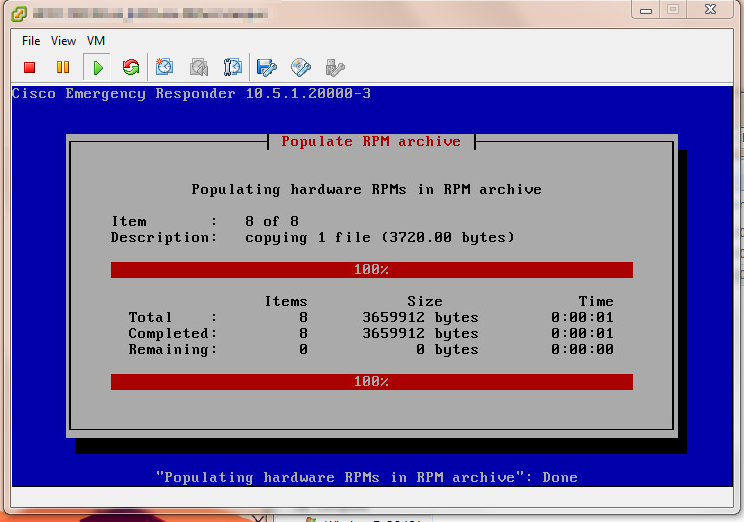
  • Follow the upgrade process on screen, when the system reboots you can view the install progress from the vmware console.

And that’s it. Once completed you should now have a fully upgraded version of CER 10.5, complete with migrated data from the old physical installation.